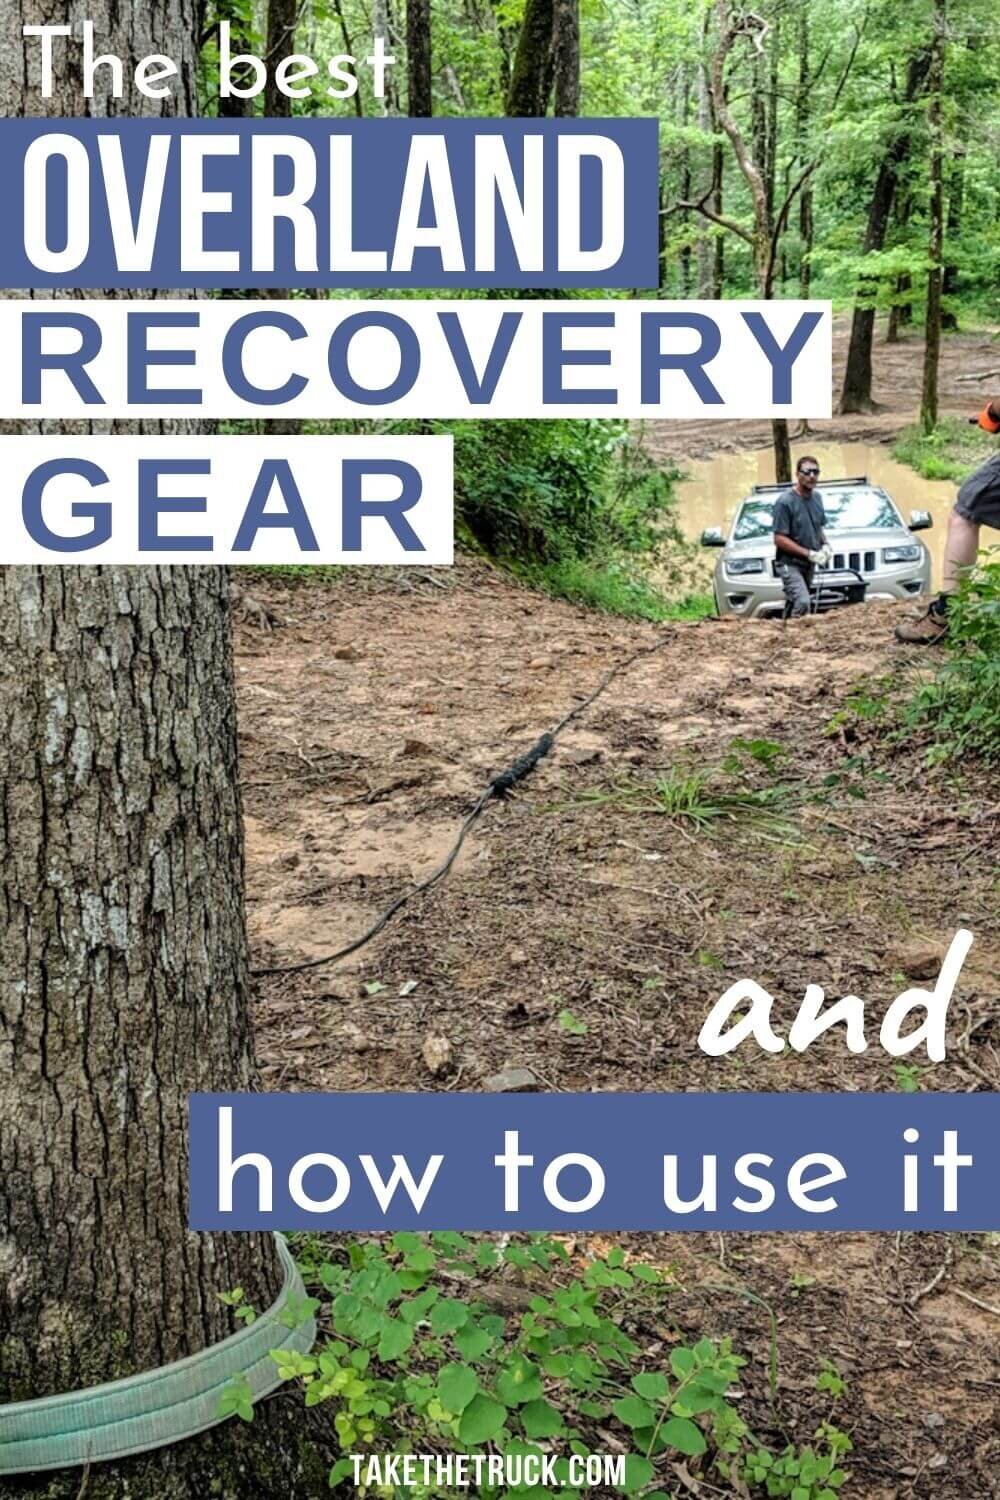
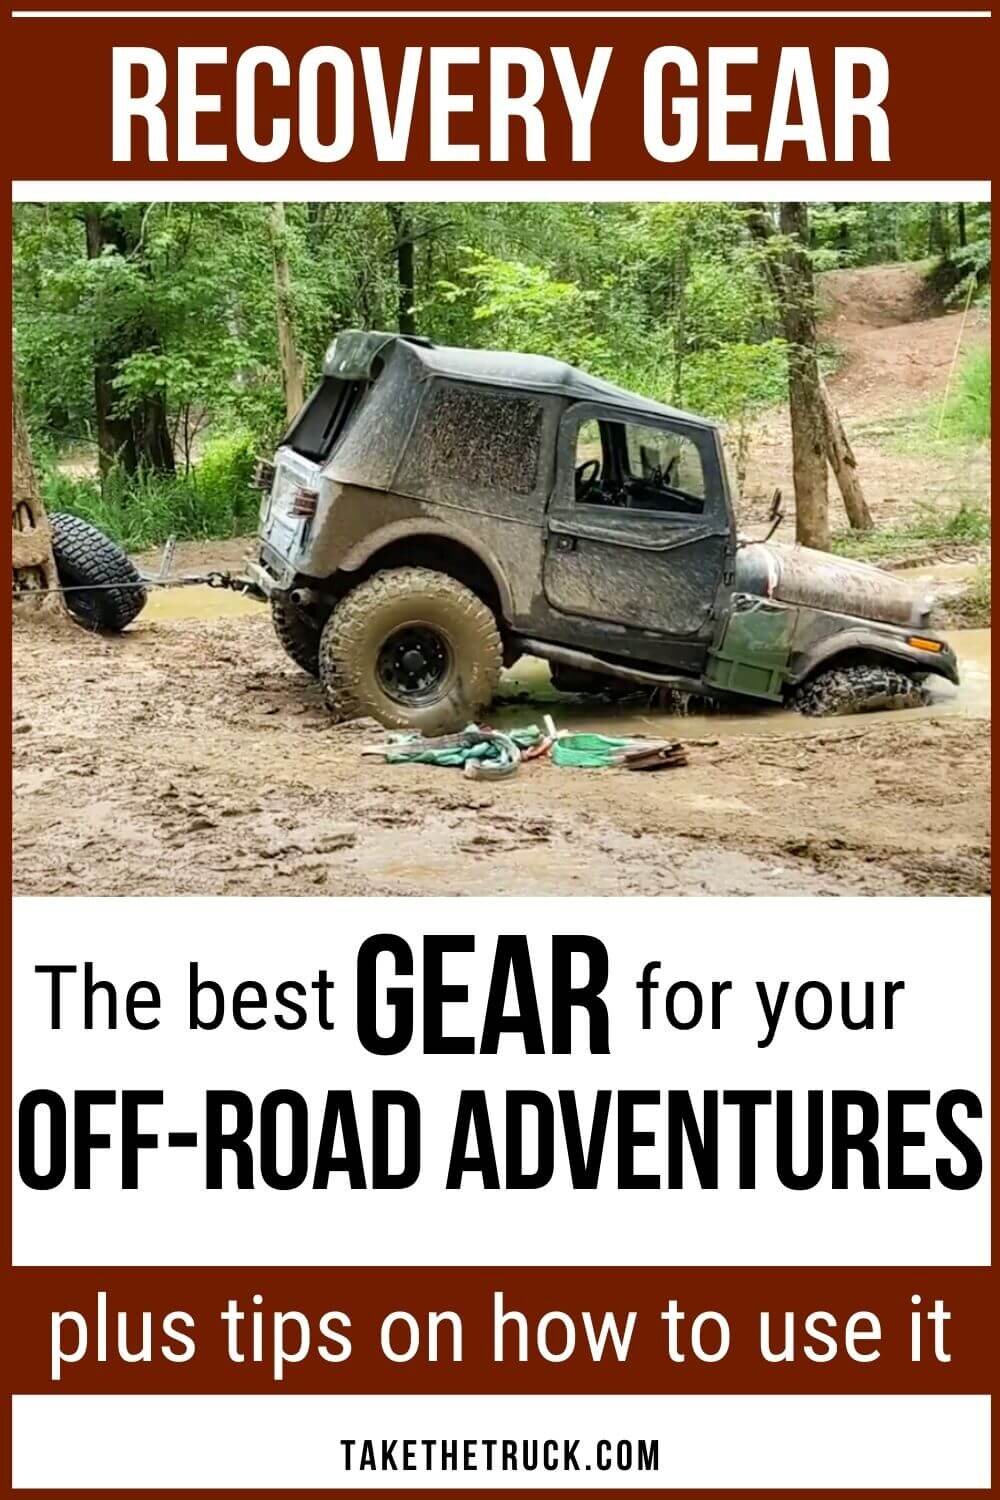
Overlanding Recovery Gear
Overlanding gear and off road recovery gear consists of any gear or equipment that can help you facilitate the recovery of your vehicle from a stuck position or to navigate difficult driving terrain during overland travel or other off-road driving situations.
In this guide we’ll discuss the most commonly used overland recovery gear, as well as the fundamentals of how to use it when an off road recovery is required.
*(This post contains affiliate links. This means we may receive a small commission, at no additional cost to you, if you make a purchase through a link. See our full disclosure.)
ESSENTIAL OVERLAND RECOVERY GEAR For Off Roading
There are thousands of off road recovery devices on the market, and while this is not a comprehensive list of every one of them, we’ll go over the essential overland recovery gear so you can feel confident in hitting the trail a little more prepared for your next adventure.
Emergency Communication Devices
If you find yourself unable to perform a self-recovery off road while overlanding you need a way to reach out for help. And unfortunately cell signals aren’t as ubiquitous as we’d like even with a signal booster, so you’ll want to invest in a secondary means of communication.
There are several options on the market, such as HAM Radios (license required, except for emergency use), GMRS Radios (license required, limited range), or Satellite Communicators.
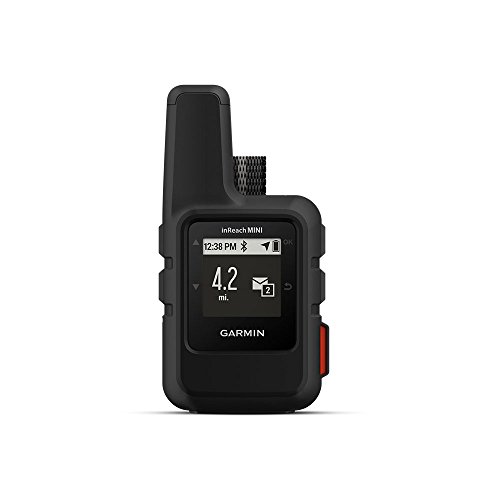
Of these options, Satellite Communicators are the most user friendly, and we typically recommend the Garmin InReach Mini* which allows you to transmit an emergency SOS if needed or send SMS text messages via satellite to communicate with loved ones anywhere in the world - even when you don’t have cell service. For a more detailed walkthrough of options check out our guide to Overland Off Road Radios and Emergency Communication Devices
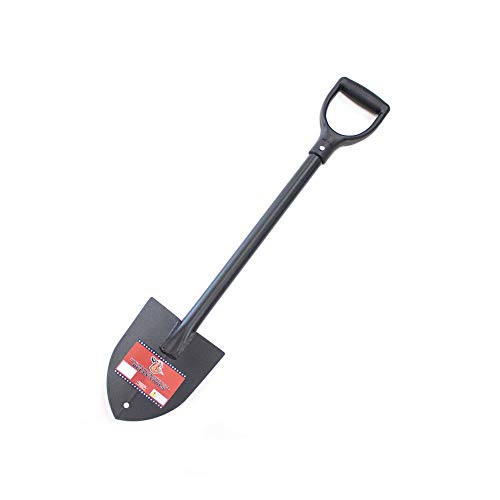
Off Road Recovery Shovels
With a variety of uses while overlanding, a good shovel is worth its weight in gold for off road vehicle recovery. You’ll primarily use your shovel for recovering your overland vehicle when it becomes mired in either mud, sand, or snow, or to create drainage for bogged sections of a trail that would otherwise be too deep to navigate.
Your overland vehicle recovery shovel doesn’t need to be anything fancy or expensive, but it does need to be sturdy and weather resistant (especially if stored on the exterior of your vehicle). You can typically get by with a basic model found at any big box hardware store, or you can check out our guide on How to Choose The Best Off Road Shovel for Overlanding for a deeper dive into some overland vehicle specific options.

The DMOS Delta Shovel* is made in the USA and features a fully collapsible design constructed of light-weight materials but it is undoubtedly a more expensive solution. So if you have the space, we’d recommend the Bully Tools Trunk Shovel* that’s also made in the USA, featuring a solid steel construction at a much more budget friendly price - though it is not collapsible or nearly as compact as the DMOS Delta.
Vehicle Recovery Axes & Saws
Beyond their multiple uses around camp, an axe and saw are extremely useful for off road vehicle recovery while overlanding. Especially for clearing downed trees from the trail, creating a skid for recovering a vehicle whose axle has been damaged beyond repair, or for cutting limbs for traction aid in situations where your overland vehicle has become mired and recovery boards are not on hand.
Due to the general degradation of steel quality over recent decades, investing in a high quality axe and saw will save you heartache on the trail and potentially money down the road - these are definitely buy once, cry once pieces of recovery gear.

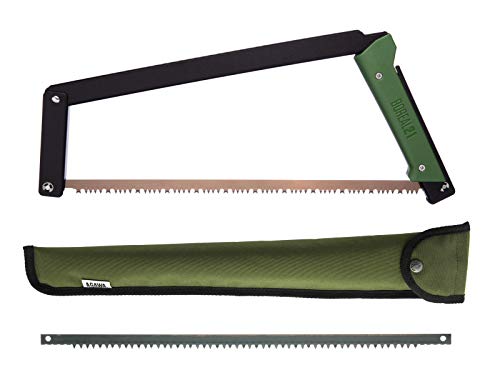
The Helko Woodworker Axe is a German made recovery axe constructed of extremely high quality steel that will last a lifetime, and the Agawa Canyon Boreal 21 Saw is an incredibly stout and compact folding saw with high quality Swedish steel blades.
(Alternatively, you can source a vintage hand forged axe made of older high-quality steel - like the Plumb Autograf we carry - as a more budget friendly recovery ax option)
Off Road Vehicle Jacks: Hi-Lift Jack vs Bottle Jack vs Air Jack
A vehicle jack is another essential piece of overland recovery gear, and there are no shortage of options available. Often the best solution, if you intend to be off road consistently in a variety of terrain conditions, is to carry a combination. Like all pieces of overland recovery gear - practice and training is key to safety and effectiveness. And always remember: NEVER get underneath a vehicle supported by an off-road jack. Check out our Complete Guide to Off Road Jacks for a more in-depth look at all of the overland jack options available.
Hi-Lift Jacks
The Hi-Lift Jack is arguably the most versatile piece of off-road vehicle recovery gear, and it’s certainly the most recognizable overland vehicle jack on the market.

PROS
Tallest lifting capability of any off-road recovery jack
Fast and simple to use
Does not require space/placement underneath the vehicle
Can be used as a manual winch or come along
Works in a variety of terrain surfaces (with an off road base plate)
Can be used for compressing when reseating tire beads or as a makeshift vice for replacing drive shaft u-joints and other trail repairs
CONS
Heavy and bulky to store
Affected by dirt & the elements - requires routine maintenance,cleaning, and greasing
Not designed for most stock vehicles - requires appropriate and safe jacking points on locations such as aftermarket bull bar bumpers, rock sliders, etc.
In order to change a tire, the chassis of the vehicle must be jacked up high enough to completely uncompress the suspension so that the axle will then lift off the ground
More Dangerous - due to the heights of lifting required, they’re more unstable than other off road jacks, and due to their long handled lever design they’re particularly dangerous when lowering the vehicle as the handle, if inadvertently released, can slam against the body of the jack potentially causing injury.
Require an additional base plate* to improve stability
We highly recommend reviewing Bruce Elfstrom’s Hi-Lift write up if you’ll be carrying a Hi-Lift as part of your off road recovery gear, as well as training with others in your local off road or overland community.
Bottle Jacks
Though they lack the versatility of a Hi-Lift jack, a standard bottle jack should always be your first choice in a recovery or off road repair situation. It is much easier to use safely, provided you have or can create a stable solid surface for the jack’s base.

PROS
Excellent for recoveries on hard compacted soil or rocky terrain
More stable (especially with an additional baseplate)
Steady lifting and lowering is more controlled
Less affected by dirt and the elements, very little maintenance required
Small, compact form factor
Typically short enough to be placed under your vehicle’s axle making tire replacements and repairs easier and safer.
Typically higher load rating than other off road jacks
CONS
Not practical for recoveries in soft terrains such as mud and sand
Requires space/placement underneath the vehicle
Shorter lift height than other overland recovery jacks (typically 20” or less, but the jack itself can be elevated to offset this)
Requires additional baseplate to improve stability
Though costly, the hydraulic Safe Jack System offers a variety of adapters and stabilizer base plate options to choose from that are excellent for off road recovery and repairs.
Alternatively, you can find used factory Toyota bottle jacks, some with nearly a 20” total lift stroke, that have a mechanical gear-driven design that means it isn’t subject to leaks like hydraulic bottle jacks.
Air Jacks / Exhaust Jacks
Air Jacks, also known as exhaust jacks, are useful for off-road vehicle recoveries in soft terrain conditions. The jack’s thick multi-layer rubberized canvas bag is positioned beneath the frame of the vehicle and then utilizes either your vehicle’s exhaust gases or an air compressor to inflate the bag, thus raising the vehicle up.

PROS
Excellent for recoveries in loose terrains, such as bogs, sand, or mud, due to their wide surface area
Flat profile fits under your vehicle in tighter situations, requiring less digging
Fast
CONS
Can be damaged/punctured if used on rough terrain or by a sharp edge on the vehicle
Requires two people to safely operate
Bulky when stored
Not compatible with vehicles with twin exhaust
Dealing with noxious exhaust fumes
Limited lift height (typically around 30” max)
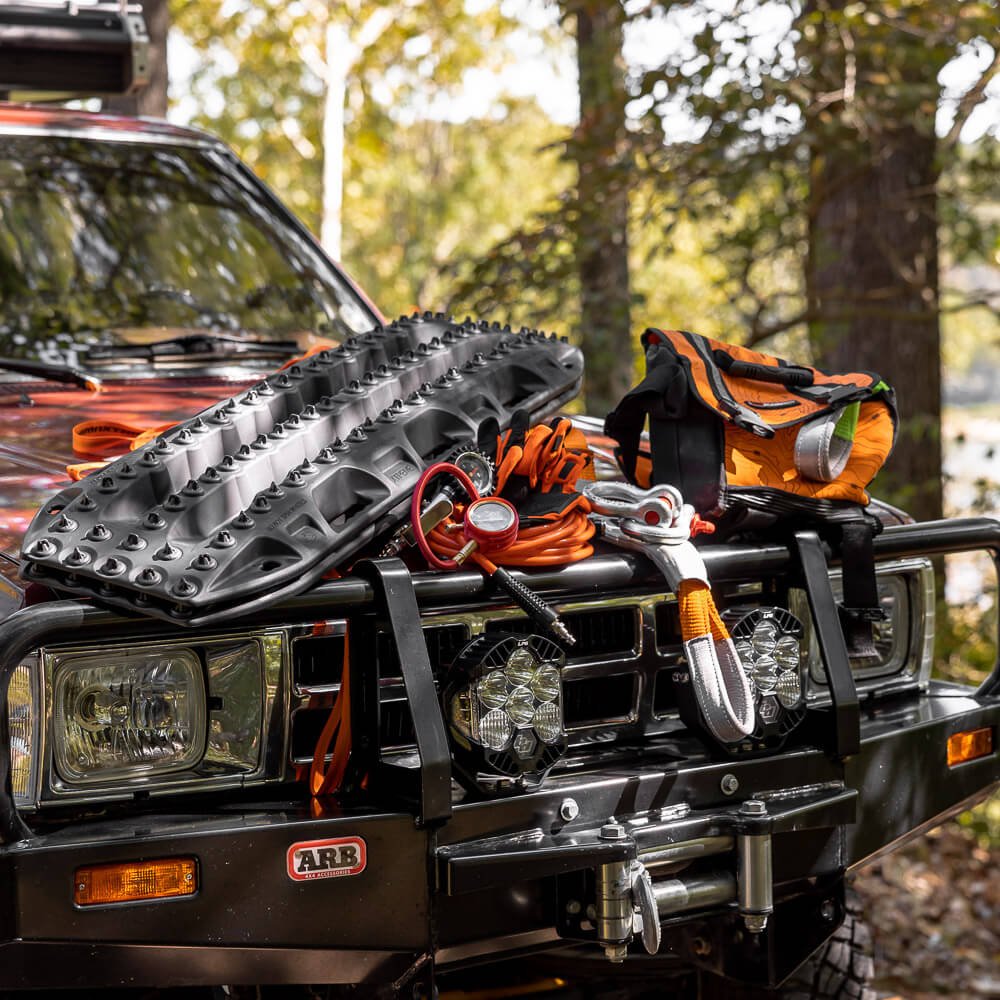
Off Road Recovery Boards
Recovery boards are a traction aid for off road vehicle recovery in loose or soft terrain conditions such as sand, mud, or snow and can offer a far easier method of vehicle recovery in certain instances where winching would otherwise be required.

The recovery boards are simply placed beneath the front of your overland vehicle’s tires, and the nodules on the recovery board provide a tractive surface for the tires to grip to.
This surface will enable you to carefully drive the vehicle out of its stuck position. But note that excessive wheel spin on a recovery board can damage both its traction surface and potentially your vehicle’s tire.
While there are a multitude of recovery boards on the market, we recommend the original Maxtrax brand recovery boards due to their time-tested and Australian-outback-proven design.
Vehicle Recovery Winches
A vehicle winch is arguably the most useful tool for off-road vehicle recovery when overlanding, allowing you to safely utilize a variety of self-recovery techniques as well as give you the ability to help others with vehicle recovery. Though it does require the most care and training of all the pieces of recovery gear.
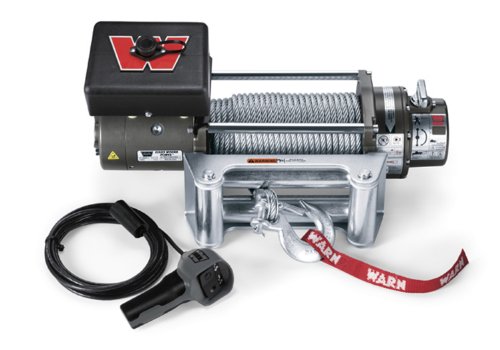
There are a variety of vehicle winch manufacturers on the market today, but Warn Industries are the pioneers of the consumer electric winch, and they’ve only improved upon their design over the last half century.
However, the particular electric winch you select must be properly rated for your overland vehicle’s gross vehicle weight (which we’ll discuss in greater detail below).
Off Road Recovery Kits
There are a variety of overland recovery kits on the market for any array of off road winching and recovery purposes. They typically consist of a mix of tow straps, kinetic recovery straps, tree saver straps, shackles, winching gloves, snatch blocks, recovery dampers, and winch line extensions.

Let's look at these components individually so you can determine which off road recovery kit is right for you:
Tow Strap - A strap, typically made of polyester or other synthetics, used for slow static pulls when recovering a vehicle from a stuck position off road
Kinetic Recovery Strap - A strap, typically made of nylon, used for dynamic/kinetic pulls when recovering a vehicle from a stuck position off road - also known as a snatch strap
Tree Saver Strap - A relatively shorter strap that is typically sleeved with a protective layer and used to protect trees when being used as an anchor point during an off road recovery that requires a winch
Bow Shackles | D-Ring Shackles | Soft Shackles - Bow shackles, D-ring shackles, and Soft shackles are all used to provide a secure connection to an overland vehicle’s recovery points or other strap/winch line juncture used in off-road vehicle recovery systems.
Though they’re often referred to interchangeably, Bow Shackles have a distinct rounded or “bowed” loop shape allowing for multi-directional pulling at the compromise of typically lower load rating - especially at extreme off-angle pulls. For instance at a 45 degree off-angle the load rating of a bow shackle is decreased by 30% and at a 90 degree off-angle it’s reduced by 50%.
D-ring shackles have a narrower “D” shaped loop providing a typically higher load rating but are only intended for directly forward linear pulls.
Soft Shackles, like this popular model by Bubba Rope*, are made of synthetic high modulus polyethylene rope (similar to synthetic winch line material) that offers a typically higher load rating and breaking strength in comparison to steel bow shackles or D-ring shackles. They can be pulled at off-angles and because they’re significantly lighter they’re considered safer than steel shackles in the event of a failure. For these reasons, soft shackles are generally the preferred option to use in most recovery scenarios.
Winching Gloves - There are a lot of ways to injure a hand during an off road winching recovery, and winching gloves will help to protect them.

Snatch Block - A snatch block is a small single-pulley recovery device that is placed around your winch line to facilitate a variety of self-recovery and off road vehicle recovery techniques.
The principle benefit of using a snatch block (or two) in an off road recovery situation, is to decrease the working load on your vehicle’s electric winch.
By creating a multi-line pull using a snatch block, you can compound your winch’s mechanical pulling efficiency. (This is covered in greater detail in the winching video below - in which it’s often referred to as a pully block)
Recovery Damper - A winch line recovery damper is a safety device that typically consists of a thick weighty fabric that is draped over the winch line, prior to a load being placed on it, to “dampen” or absorb some of the kinetic energy of the line in the event of a winch line, strap, or shackle failure.
Another great recovery damper strategy, involves tying a short (but slack) secondary synthetic safety rope to the winch line prior to a load being placed on it, using a prusik knot so that it can be easily adjusted.
This will help to control the kinetic energy of the winch line in the event of a shackle or anchor point failure.
These recovery dampers can be used in conjunction to provide a higher degree of security while winching off road.

Winch Line Extension - A winch line extension is typically a synthetic rope, strap, or sometimes wire rope used to extend the pulling length of your vehicle’s electric winch when an anchor point is too far from your stuck vehicle’s position.
Though you can piece together this overland recovery gear yourself into a custom kit, we feel the ARB Premium RK9 kit* offers a good mixture of recovery gear to get you started at a relatively decent value. It’s the kit we still use today (though we have added a few soft shackles and a new pair of gloves to ours over the years).
Land Anchors
When an anchor point is completely unavailable for your winch line, land anchors can be a viable solution in the right terrain. By “anchoring” them into the ground, you can create an anchor point for your overland vehicle’s winch line.

Alternatively you can use your vehicle’s spare tire and create what is known as a “Deadman Anchor.” You can do this by digging a hole with your recovery shovel to a sufficient depth (the deeper it is the stronger and more secure the anchor will be) and burying the spare tire with your winch line securely attached in order to create an anchor point similar to that of a land anchor.
Off Road Air Compressor & Tire Repair Kit
While not strictly a piece of overland recovery gear, having or installing an onboard air compressor (or a portable air compressor*) and keeping a quality tire repair kit on hand is vital to making tire repairs while off road, as well as easily airing down your tires for increased traction when driving off road.
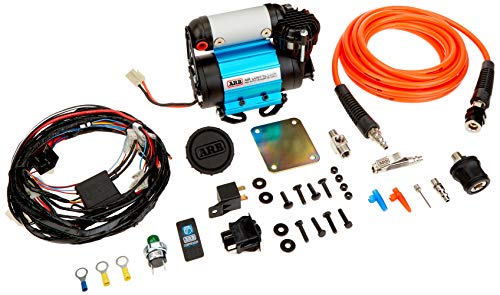

ARB’s line of off road air compressors are the most widely used, and ours has always been extremely reliable, having never once let us down.
USING YOUR OVERLAND AND OFF ROAD RECOVERY GEAR
First, know that we are NOT professional or certified recovery experts - we’re constantly learning both in the field and from online resources just as you are now! This is merely a collection of information and resources we’ve learned and referenced in an effort to help you understand the basics of using your overland and off road recovery gear safely and efficiently.
One of the greatest resources for learning about off road recovery is to engage with the overland community and learn from direct experience with a group. You can reference our guide to Overland Expos, Events, Groups, and Rallies to see where you can get real-life experience with your recovery gear.
Another excellent way to become properly trained to use your off road recovery gear is to locate a certified I4WDTA training instructor in your area and pay for professional training classes on off-road vehicle recovery and driving.
While some of the principles of off road and overland vehicle recovery sound complex, most are rooted in fairly basic physics principles.
And remember that vehicle recovery is never an exact science, it’s a skill that is honed and perfected with practice and experience - these basic principles are merely to give you a starting point.
Know Your Personal Skill, Vehicle, and Recovery Gear’s Limitations
This is the single most important factor in overland vehicle recovery. And while it’s easy to say, “Never get yourself into a situation that is outside of your skill level, your vehicle’s capabilities, or your recovery gear’s limitations” - the fact is that you often won’t know until you’re there.
But it’s imperative that when your planning an overland trip you take every precaution to select overland trails and routes that are within your skill set and limitations, especially when overlanding solo.
Know When to Stop and Access the Situation
While this is subjective and mostly a gut-hunch that gets more accurate and attuned with your off-roading and overlanding experience, the second you begin to feel uncomfortable - whether it’s while driving OR performing an off road recovery - it’s nearly always better to stop, access the situation, and pivot your plan of action if needed.
The caveat to this being a situation where your stopping will create an even more unsafe or dangerous situation for yourself and others around you.
Know Your Overland Vehicle’s Gross Vehicle Weight (GVW)
One of the most key factors that you should know about your overland vehicle is it’s Gross Vehicle Weight (or GVW). You can easily determine your vehicle’s GVW by taking it to a Certified CAT Scale and having it weighed.
Furthermore, every overland vehicle has a stated Gross Vehicle Weight Rating (GVWR) that should not be exceeded to stay within the safety constraints of the vehicle manufacturer’s design. With all the overland gear we tend to collect on our rigs, it’s very easy to exceed this limitation, so having your vehicle weighed is useful for determining whether or not you should lighten the load.
Working Load Limit vs Breaking Strength of Off Road Recovery Gear
Every piece of overland and off road recovery gear will have stated ratings that define their limitations. Your recovery system’s overall rating will be defined by its weakest link (or the lowest rated piece of gear being used), and care must be taken not to exceed this limitation to avoid the dangerous or potentially lethal consequences of a break or failure in your recovery system.
Working Load Limit - is the limit of load a particular piece of recovery gear was designed to withstand under normal usage conditions in order to avoid excessive wear or premature failure.
Breaking Strength - defines the extreme limitations that a particular piece of off road recovery gear could withstand under a shock load situation before failure occurs. This limitation is never to be exceeded during any given off road recovery.
These ratings should be printed on the recovery gear itself, or listed on the manufacturer’s website - if you have a piece of recovery gear with no stated rating, DO NOT USE IT. And always remember that no matter what the recovery method you’re using, ONLY USE vehicle attachment points that are rated for recovery or the vehicle’s frame in the event that no rated attachment point is available.
Static Recovery Pull vs Kinetic Recovery Pull
The two primary methods of pulling a vehicle out of a stuck position (often referred to as the “problem vehicle”) using another “recovery vehicle” are: a static recovery pull and a kinetic recovery pull.
Static Pull - in a static pull, light tension is placed on the line prior to the recovery pull, and the tension is kept on the entire off road recovery system until the stuck vehicle is freed. This method relies more on torque and slow consistent throttle, and utilizes fixed lines such as a properly rated polyester tow strap.
This method of recovery pull can be used in any type of terrain or stuck situation as long as the recovery vehicle’s GVW is greater than the problem vehicle’s GVW.
Kinetic Pull - a kinetic pull utilizes a special kinetic recovery strap/rope that stretches and rebounds similarly to a rubber band. When performing the recovery, there is a small amount of slack left in this line, and the recovery vehicle then applies a vigorous burst of throttle to create a shock load on the strap. The stored energy of this shock load is then transferred, as the kinetic strap rebounds, to free the stuck vehicle.
This method is typically best used to free a vehicle that is mired in soft terrain such as sand, mud, or snow. Another benefit is that this method can be used successfully even if the recovery vehicle’s GVW is lower than that of the problem vehicle’s.
Understanding Impacts of Slope Resistance on your Overland Recovery Gear
Slope has a huge impact on the dynamic load placed on your off-road recovery gear when performing a vehicle recovery while overlanding.
When PULLING Uphill - Approximately every degree of incline has a +1.667% INCREASE on the dynamic load placed on the recovery equipment used when a vehicle is being pulled uphill.
For Example - If a vehicle with a GVW of 5500lbs is being pulled up a 20 degree incline, the slope’s resistance effect can be estimated by:
5500 [GVW] x 20 [degree of the incline slope] x 1.667% [average incline slope resistance]
= an increase of 1833.7lbs of resistance
So, if there are no other resistance factors (as discussed below), the effective dynamic load on the recovery gear in this example is 5500lbs + 1833.7lbs = 7333.7lbs
When LOWERING Downhill - Approximately every degree of decline has a -1.667% DECREASE on the dynamic load placed on the recovery equipment used when a vehicle is being lowered downhill.
For Example - If that same vehicle with a 5500lb GVW is being lowered down a 20 degree decline, the slope’s resistance effect can be estimated by:
5500 [GVW] x 20 [degree of slope decline] x -1.667% [decline slope resistance]
= a decrease in resistance of 1833.7lbs [or -1833.7 lbs of resistance]
So, if there are no other resistance factors (as discussed below), the effective dynamic load on the recovery gear in this example is 5500lbs - 1833.7lbs = 3666.3lbs
Understanding Impacts of Terrain, Mire, & Vehicle Damage Resistance on Recovery Gear
Terrain and weather effects such as boulders, loose gravel, ice, flowing water, etc. all have a different effect on the resistance a stuck vehicle places on your recovery equipment and factor into determining an appropriate recovery technique based on the anticipated dynamic load.
Likewise the degree to which a vehicle is mired (i.e., how sunk or bogged the vehicle is in mud, sand, snow, etc.) also has a dramatic effect on the amount of resistance and dynamic load that the stuck vehicle’s GVW places on your off road recovery gear.
For example, a vehicle mired up to it’s axles may have the effect of approximately doubling the dynamic load of the vehicle’s GVW. So a vehicle with a GVW of 5500lbs, mired to it’s axles, would exert an effective 11000lb dynamic load on the recovery equipment being used - assuming there is no Slope Resistance to factor in.
Lastly, if there is any damage to the vehicle that impacts it’s rolling resistance, this will further add to the load on the recovery equipment and will need to be considered.
Due to the unpredictability of these factors, and variations in terrain, it’s ALWAYS recommended to add an additional 25% of your overland vehicle’s GVW to your total estimated dynamic load calculations as a safety margin.
Overland and Off Road Winching Basics
Becoming skilled and effective at off road winching is incredibly valuable to anyone interested in overlanding and self-recovery off road.
We have a detailed guide on How to Choose and Use a 4x4 Winch that includes basic winching techniques to help get you started (you can also check out our Detailed Review and Guide for the Warn M8000 Winch that we’ve been using for over a decade on our off road and overland travel adventures).
But like any other skill, it takes training and practice to become proficient, and the best way to gain this proficiency is to go out with a group of experienced off-roaders for some direct experience. With that said, the below video is one of our favorite (albeit dated) winching recovery training videos to help get you started:
Overlanding and Off Road Recovery Spotting and Hand Signals
When driving off road or performing an off road recovery, a spotter is someone who stands outside of the vehicle to provide driving feedback in order to assist the driver with navigating difficult obstacles. They can see things the driver cannot, and can direct him or her accordingly.
Here are some basic guidelines for spotting a vehicle off road:
The spotter should always be someone whose feedback you can trust
Only use one spotter (mixed messages can be distracting and dangerous to the driver)
Never be in a hurry, the skinny pedal is an expensive addiction off road
Always make sure you can see your spotter (and anyone else that could be in the way)
When in doubt, get out and take a look - you’re the one in the driver’s seat and the one who’s ultimately responsible for your overland rig
Winching Recovery Hand Signals
Thankfully, the winching hand signals below, outlined in every Warn winch manual, are a universally accepted means of communicating with a driver during an off road recovery utilizing a vehicle winch.
Spotter Hand Signals
Unfortunately, there’s no universally agreed upon set of off road hand signals for spotters to use for general obstacle navigation while overlanding. However here are some basic signals you can use as a starting point:
Drive Forward - Put your hands up with the palm facing towards you and wave the driver forward. Pinch your thumb and index finger together on one hand if you want the driver to advance forward only a small amount.
Stop - Use a closed fist to signal the driver to stop.
Turn - Point with your thumb or index finger to either the left or the right when you want the driver to turn. By exaggerating this movement you can indicate you want the driver to go to full lock, and use more subtle movements when smaller steering corrections are needed.
Reverse - Using an open palm towards the driver with both hands, make a pushing motion. The pinching motion with the thumb and index finger of one hand can be used here as well in order to communicate how much or how little reversing is needed.
If you’re driving off road or overlanding with a group and need a spotter for navigating difficult obstacles, always be sure to come to a consensus on easily identifiable hand signals to use BEFORE you begin your route in order to mitigate miscommunications.
We hope that this guide to overlanding and off road recovery gear, as well as the overview of it’s usage, helps you to get equipped and be more prepared for your future overland adventures.
Be sure to SUBSCRIBE for future blog updates, and drop a comment down below with any questions - we’d love to help!
And as always, thanks for reading!
Related Posts:
Save to Your Overlanding Pinterest Board!
We’d appreciate a share!