Tune Outdoor M1 Pop Up Truck Camper Review
A year ago we had never even considered switching campers; we had been plenty comfortable in our GFC while traveling for weeks at a time as a family of three. But on our first multi-week trip as a family of four, it got to be a bit cramped and it became apparent we may need something with a bit more space if we intended to enjoy traveling long term.
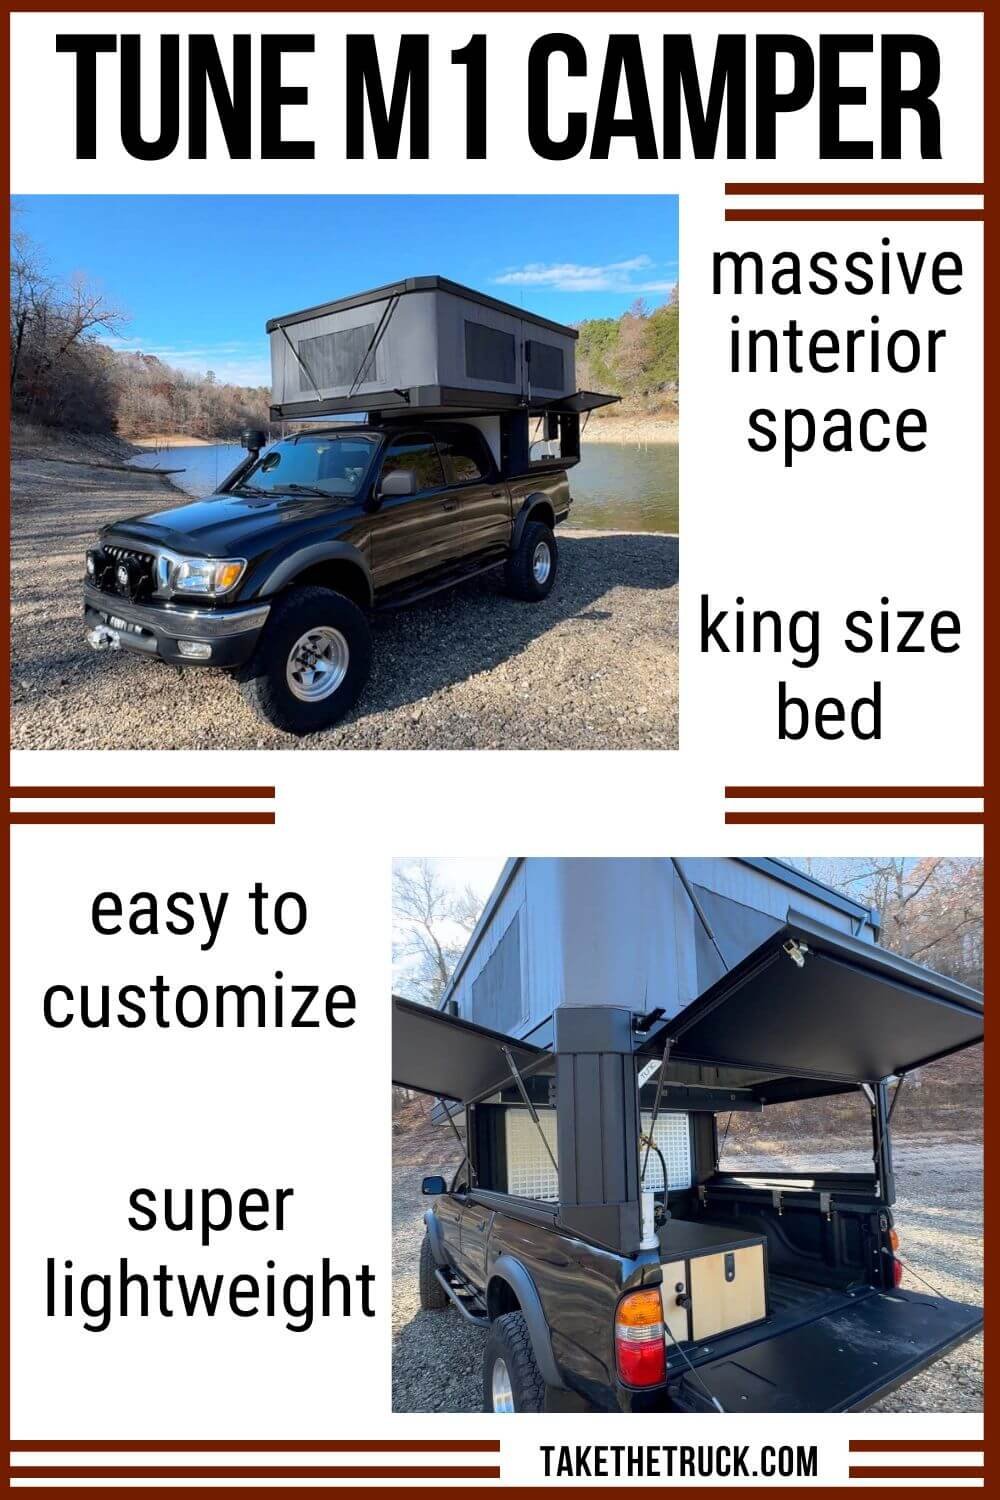
As fate would have it, on that same trip, we ran into a young family in Utah who were traveling home in their 3rd gen Tacoma with a new camper that had immediately caught our eye as we pulled into the Hollow Mountain gas station outside of Hanksville. After introducing ourselves and getting a closer look, we were absolutely shocked at the amount of interior space! “A king size bed?!” “It only weighs 360lbs?!” “What camper is this?!”
The answer was the Tune Outdoor M1.
Long story short, after hours of researching all of The Best Lightweight Small Truck Campers, we put down a deposit and picked up our new Tune Outdoor M1 camper only a couple months later!
In this review we’re going to cover everything you need to know about the Tune Outdoor M1, and why it’s the absolute best lightweight pop up truck camper on the market for a family.
Who is Tune Outdoor?
Tune Outdoor is a relatively new company, but they’re not new to the outdoor recreation industry.
The Tune Outdoor M1 is the brainchild of Bruno McGowan (former co-founder of BackCountry Access), Ryan Bricker, Kristian (Kris) Arnold, and Sean Kepler (formerly The North Face).
Since 2020, their team of outdoor industry veterans and engineers have been perfecting the M1’s design. By combining cutting edge lightweight aluminum extrusions, proprietary composite plastics, fiberglass reinforced composite panels, and a streamlined production process, they’ve create a modular, easily repairable, lightweight pop-up truck camper with an industry-leading space-to-weight ratio.
And only after putting over 10,000 grueling test miles on the camper through every condition imaginable, did they begin installing production models on customers’ trucks in 2023.
What Makes the Tune M1 the Best Pop Up Truck Camper
The Tune M1 comes with a TON of utility built-in, and with even its standard set of features it comes ready for adventure. Tune also offers a slough of additional upgrades and accessories to make your camper even better equipped. Plus, with the integrated T-track it’s SUPER easy to add your own DIY mods and accessories to customize your Tune M1 to your needs and adventures.
The HUGE East-West Sleeping Platform
The camper’s giant east-west sleeping platform is the feature that sets the Tune M1 apart from the majority of other lightweight pop-up campers on the market, and is a true game changer, especially for families.
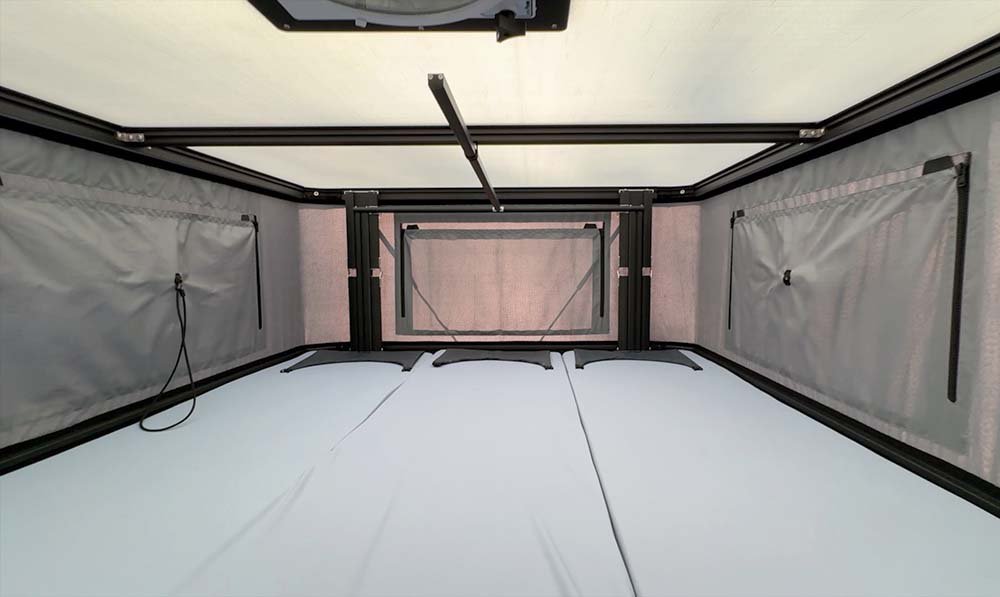
The Tune M1’s unique design allows for a huge 72” x 60” queen-size east-west cabover sleeping platform that doesn’t encroach on the truck’s bed space. This enables the full footprint of the bed to be used for gear, custom built-ins, an additional DIY sleeping platform with drawer storage, or just a TON of open space to hang out in when the weather takes an unexpected turn.
With the optional king-size bed extension (that extends the sleeping platform approximately 20 inches over the truck bed, creating a massive 80” x 72” king-size bed), we’re able to sleep our entire family of four east-west up top while still having 34 inches of passthrough space to the bed. Plus the sleeping platform doubles as a perfect indoor hangout space for the kiddos.
DIY Customization is SUPER Easy in the Tune M1
With the incredible amount of t-track (450ft!) throughout the interior and exterior of the Tune M1, it’s insanely easy to customize and add your own DIY Tune M1 accessories (we’ll highlight our personal favorites later in the review).
Standard Tune M1 Features
The Tune M1 comes ready to camp the day it’s installed, and standard features include:
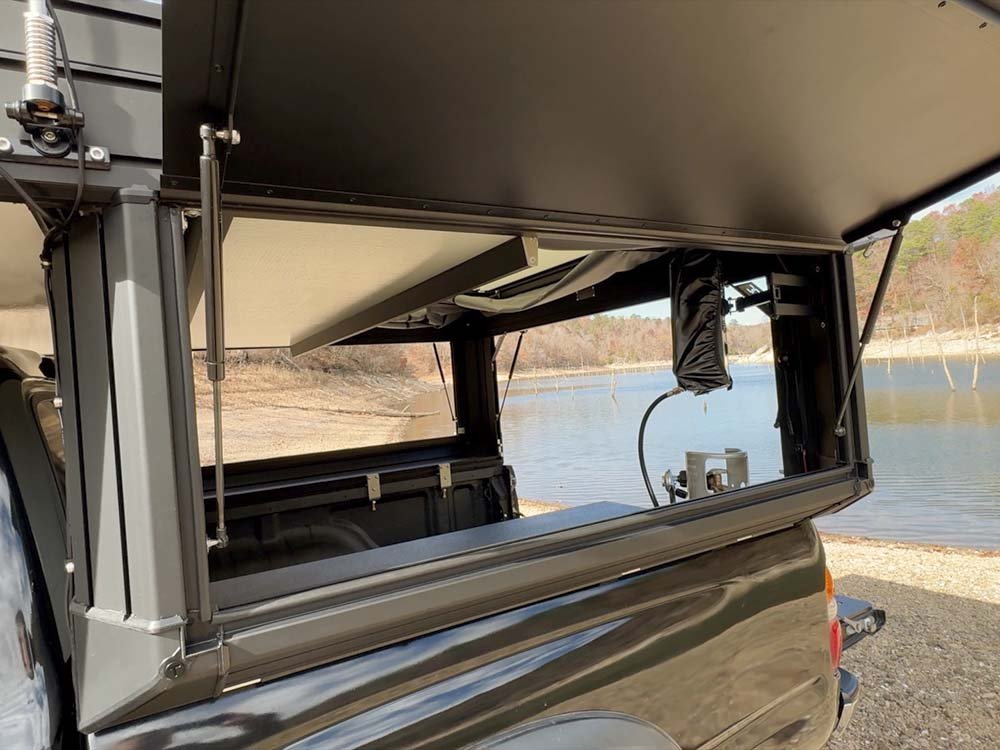
Large full length side access panels and a large rear hatch door that makes accessing gear in the bed easy, while still letting you use your truck like a truck when you’re not camping
A 4” queen-size foam mattress for the standard east-west sleeping platform
Did we mention the 450ft of built-in t-track?!
Choice of tan, blue, or charcoal tent fabric
Factory Tune M1 Upgrades
Tune Outdoors offers a ton of factory upgrade options and accessories to make the camper even more customized to your needs, including:
1/4 inch architectural smoked glass side panels and/or rear hatch door (note this option adds about 50lbs of weight to the camper)
King-size bed extension
Maxxfan 6500k or 7500k vent fan (the 7500k model with the remote control and auto-open feature is now available!)
Goal Zero Yeti solar generator power station with integrated wiring (we’ve been big fans of these solar generators for years)
Tune M1 Factory Accessories
Removable Clear Vinyl Window Inserts - these easily install in the Tune M1’s tent windows providing an easy way to enjoy the views even in inclement weather
Goal Zero Yeti 1500 Mounting Bracket - if you don’t opt for the Goal Zero Yeti upgrade at the time of purchase, you can still get the bracket after-the-fact if you change your mind
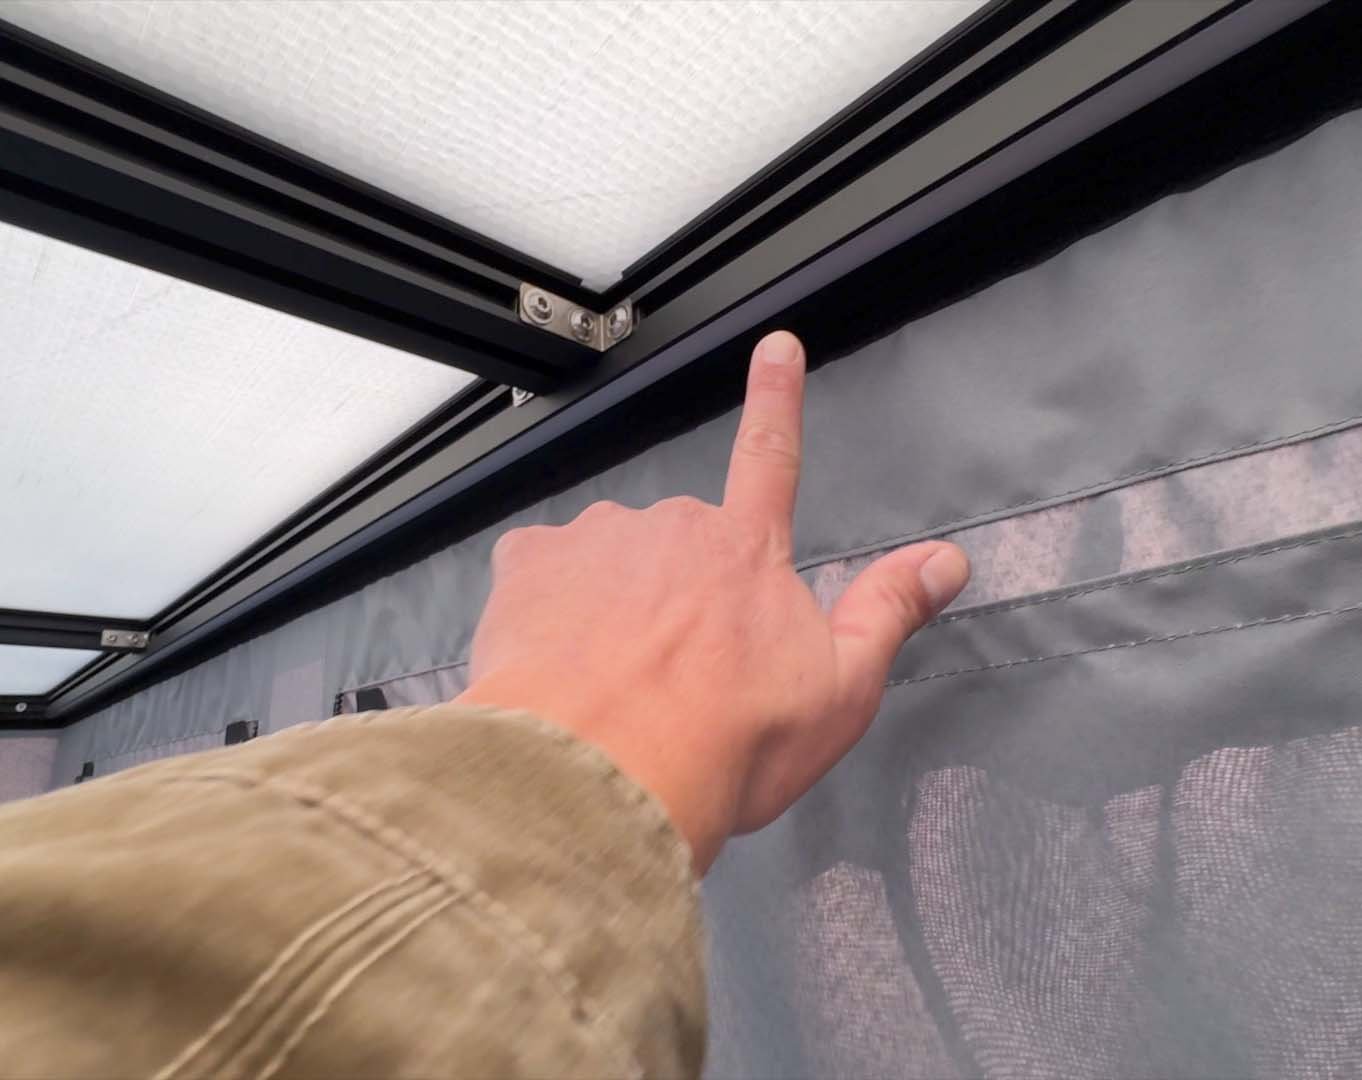
Insulation Kit (Coming Soon) - The Tune M1 tent comes prepped and ready (with hook-and-loop velcro attachments around the perimeter) for the upcoming removable insulation kit to help make cold weather camping more comfortable
Heater Kit (Coming Soon) - The folks at Tune also said they’ll soon be offering a heater kit to help keep your Tune M1 cozy in low temps
Molle Panels (Coming Soon) - linkable molle panels that seamlessly tie into the Tune M1’s t-track offering a ton of gear storage and organization options
See the full list of current accessories on their site - as the list will undoubtably continue to grow!
Cost vs Value
At first glance the Tune M1 is not cheap, at least for us, and it was a serious investment. In our post reviewing the 25 Best Lightweight Small Truck Campers currently on the market, it falls somewhere in the mid-range price-wise.
But, when you look at its standard features, modularity, and industry leading space-to-weight ratio, the Tune M1 ’s utility and value for outdoor adventures really shines. There’s really nothing comparable out there on the market at the moment.
Walkthrough of the Tune M1 Pop Up Truck Camper
How to Use The Tune M1 Pop Up Truck Camper
Besides heading out and finding a great (and preferably free) campsite to post up for the night, here are some tips for setting up your Tune M1 Camper.
Unlatch the exterior laches, and remember to leave the rear ones up a bit (roughly 2-3 o’clock position) so they don’t make contact with the rear hatch door when opened.
Open the rear hatch door and push the rear of the top up from inside the camper
Then from the exterior push the front of the pop-up top up (we’ve found this is easier than from inside), and let the gas struts take over once they engage.
From the inside, push the folding rear roof brace into place and lock
Using the extension bar, push the front folding roof brace into place and lock
Remove the tent bungees
You’re ready to camp!
To close the tent you simply follow the procedure in reverse, taking care to let the front of the roof down slowly and do a quick walk-around to ensure the tent fabric is tucked inside the camper before latching the top back down.
For more tips on making the most of your first Tune M1 truck camping experience, check out our post about 12 Truck Bed Camper Mistakes and How to Avoid Them and learn from our mistakes before you head out. 😅
*(This post contains affiliate links. This means we may receive a small commission, at no additional cost to you, if you make a purchase through a link. See our full disclosure.)
Best Tune M1 Pop Up Truck Camper Accessories
While Tune Outdoor offers a growing number of awesome factory accessories for the Tune M1 camper, below are our favorite DIY accessories you can easily add to the Tune Outdoor M1 camper yourself! We’ll be sure to update this list as we dial in our own Tune M1 build and continue to find gear that makes our personal adventures more comfortable.
M8 Hammer Nuts* - The T-track in the Tune M1 is not proprietary and accepts standard 4040 series Hammer Nuts. These are an awesome way to mount any number of other accessories to your Tune M1 camper. We’ve used a couple of these stainless steel M8 Hex Socket bolt kits* in conjunction with the M8 hammer nuts to mount all of our accessories. And you can get both hammer nuts* and bolts in a variety of sizes, if the application calls for it.
Quick Fist Clamps* - These are a super easy way to mount things like shovels and axes to the t-track in your Tune M1 and they can be easily installed using the camper’s t-track.
Olympian Wave 3 Heater* - This little propane heater is incredibly efficient at heating the space inside the Tune M1 and, thanks to the plethora of t-track, it’s easy to mount. Just be sure to check that the installation location you chose meets the manufacturer's safety clearance requirements (you should consult a trained professional to ensure safe installation). And you’ll want to get the dust cover* to help keep the catalytic mat clean and working properly. We mounted ours in the M1 using this inexpensive TV mount* (though we remove the heater from the mount when driving)
Hest Mattresses* - We’re big fans of the Hest camping mattresses, and with the king extension we were able to fit three of them side-by-side on the sleeping platform (so all four of us can get a good night’s sleep up top). If you find the standard 4” mattress that’s included with the Tune M1 not to your liking, these are a great upgrade.
DIY Storage Drawer/Platform - a drawer storage and a lower sleeping platform can add a tone of utility to your Tune M1, you can check out our guide on How to Build an Aluminum 8020 Truck Bed Sleeping Platform [with Drawer Storage] to see how we built ours.
DIY Maxtrax Traction Board Mount - this is a straightforward way we came up with for mounting maxtrax traction boards in the Tune M1 camper - this mod does require that you have the optional king bed extension installed in your Tune Outdoor M1. Here’s how to do it:
Remove the bed extension and turn it upside down on a set of saw horses.
Position your Maxtrax on the extension where you want them to sit and mark the center of the four mounting pin locations
Carefully drill the four marked locations on the FRP to 1/2in. (we used a 1/2” step drill for this)
Now you can insert a M10x21mm threaded hex-head furniture fastener into the top-side of each hole backed with a 2” fender washer* (to help distribute the load across the FRP).
Next, thread a 17mm Maxtrax Mounting Pin* into the bottom-side of each fastener (we recommend applying a small amount of blue locktite 242* to the threads to prevent loosening), again backed with a 2” fender washer to distribute load on the FRP.
Install your Maxtrax Traction boards and hit the trail!
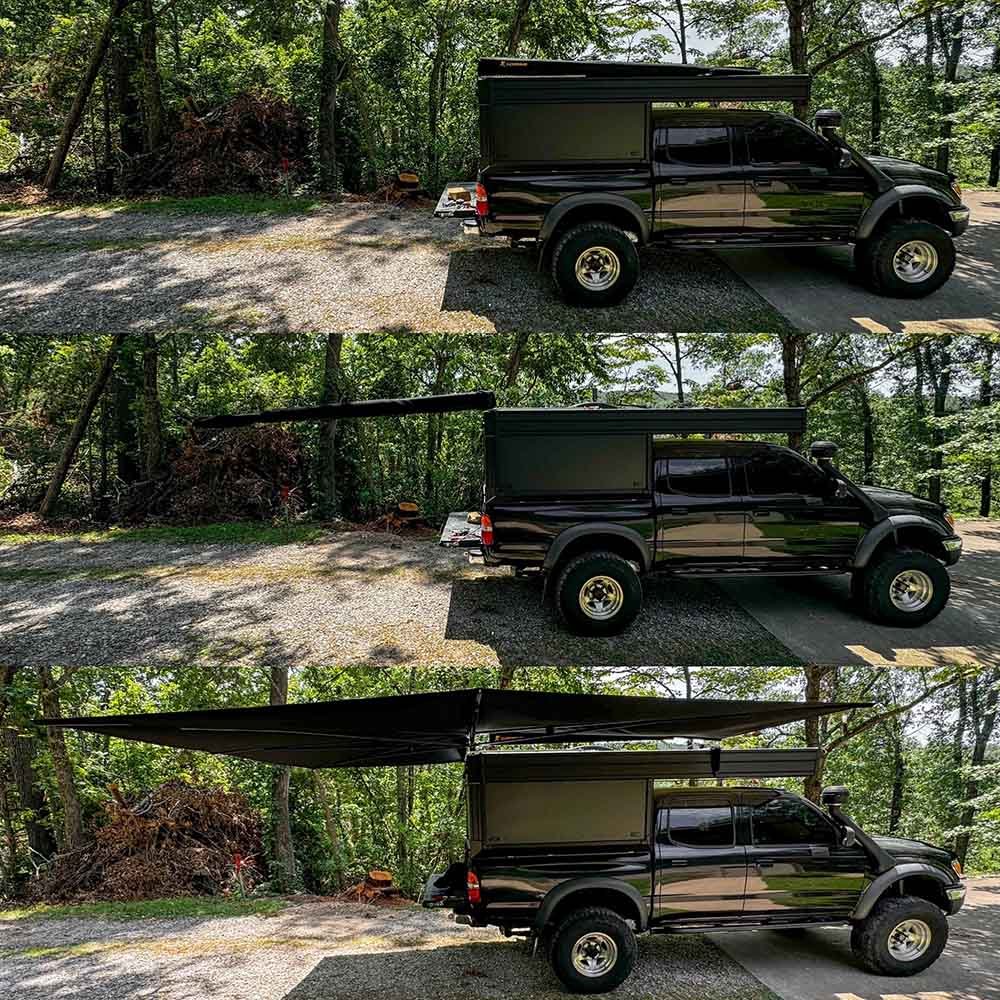
Roof-Mounted 270 Awning
We’ve got a detailed guide that covers all the best overland awnings, and Tune now offers some great universal awning brackets to mount them easily to the side of the M1.
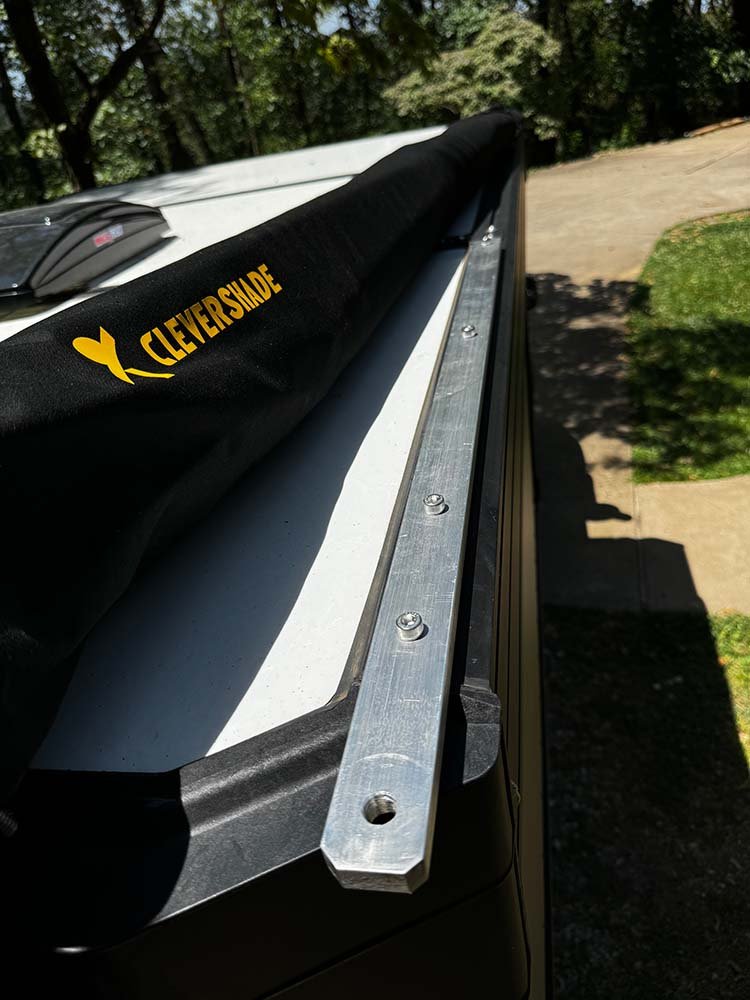
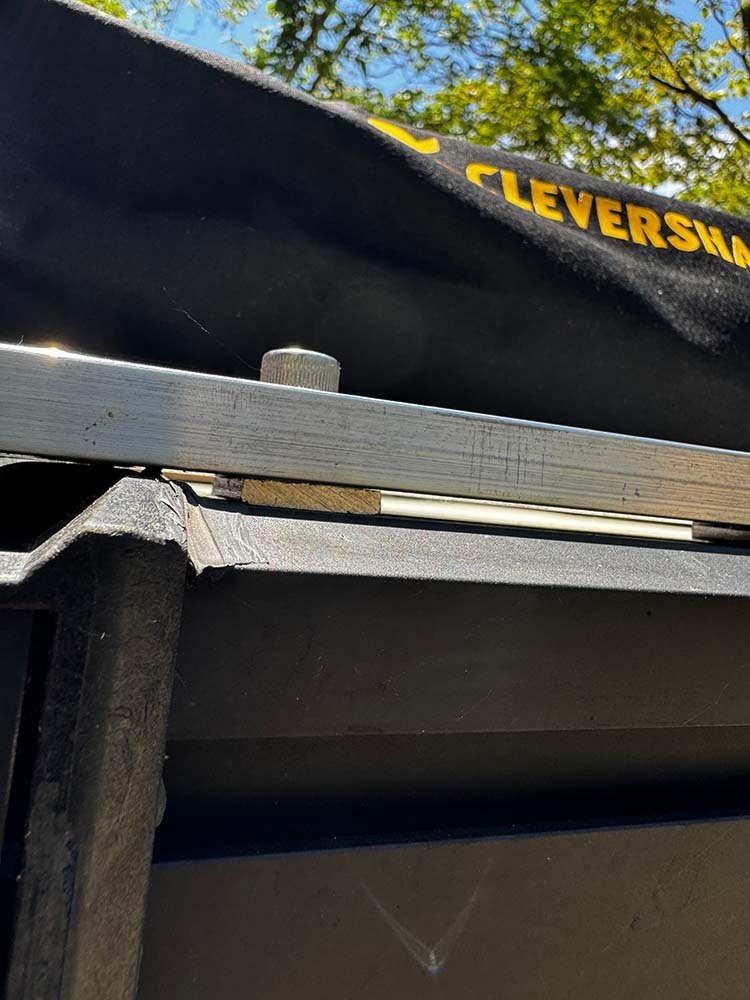
However, the with the M1’s wide profile, we didn’t really want to add to the width with an awning mounted on the side of the camper - so we came up with another solution! We purchased the Clevershade 270 ultralight (4.0 meter version) from our friends at Basil’s Garage because it uses a single-bolt primary mounting point and only weighs 35 lbs. so it can still be raised easily with the M1’s roof.
We then made a super simple DIY awning mount to bolt the awning to the roof-top t-track on the Tune M1. Below are the DIY mount details for anyone that wants to add this awesome awning to their M1 too:
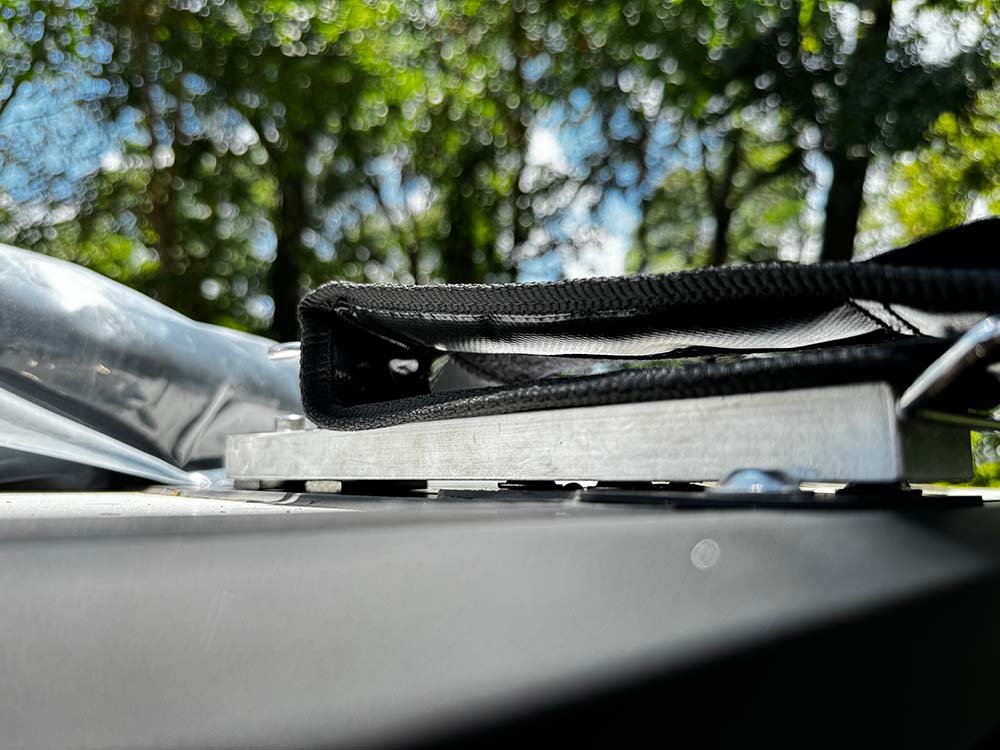
Materials Needed:
6x thick rectangular M8 washers* - used to space the DIY mounting plate off the M1’s roof and clear the corner cap drainage channels (see image for example)
6x M8 stainless 40 series hammer nuts*
Directions:
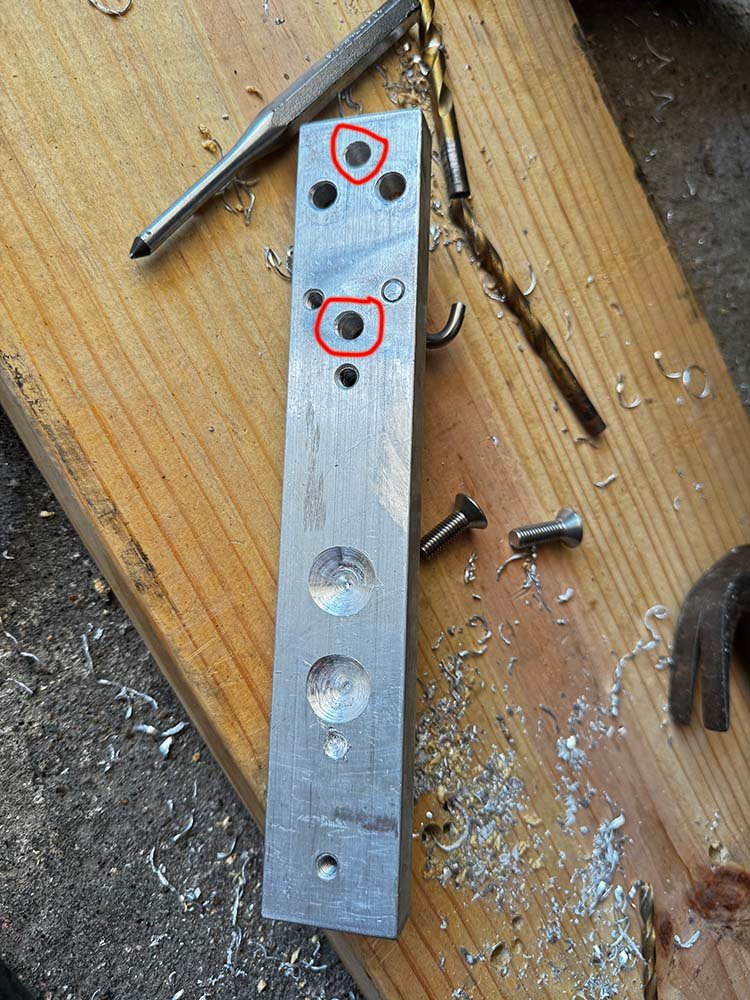
Cut the aluminum bar to 38in length (we used a miter box saw with a ferrous metal blade)
Drill a hole in one end of the aluminum bar for the awning’s mounting bolt (you can use the short aluminum block that comes with the Clevershade 270 Ultralight awning as a template for locating this hole)
Place the bar on top of the t-track on the passenger-side of the roof of the M1 so that the drilled awning bolt hole overhangs into the negative space of the Tune M1’s rounded rear corner, then mark the aluminum bar at the point where the M1’s t-track begins
With the bar removed Drill a centered M8-diameter hole in the aluminum bar 1inch forward of the mark you made in Step 3.
Drill another centered M8-diameter hole 1 inch from the opposite end of the aluminum bar (the end toward the front of the vehicle)
Drill two more centered M8-diameter holes evenly spaced between the previous two holes
You should now have a total of four M8-diameter holes that can be used to mount the aluminum bar to the Tune M1’s roof-top t-track using the M8 stainless bolts, washers, and hammer nuts - ensure that the larger awning bolt hole is situated in the negative space of the M1’s rounded rear corner (see images for detail)
Finally, mount the awning to the aluminum bar using the awning’s single large mounting bolt and double-nutted lock nuts.
We used the included front mounting bracket (another aluminum block with a strap and hook for securing the awning) and simply drilled two additional centered M8-diameter holes to bolt it to the perpendicular roof-top t-track on the M1. This mount holds the front of the collapsed awning stationary while driving.
Our Final Thoughts on the Tune M1
We’re still relatively early on in our Tune M1 camper ownership, but it’s apparent that we chose wisely.
The amount of space and comfort the Tune M1 provides is a real gamechanger, the ease of customization makes it a perfect fit for our DIY tendencies, and knowing that if something does get damaged on the trail, the camper’s modular design will make it easy to repair - all make the Tune M1 the perfect family overland travel platform.
If you’re in the market for a lightweight pop-up truck camper, then you should definitely consider the Tune M1 - you can check out their site for more details.
We'll be following up as time goes on to share our personal long-term experience with the Tune Outdoor M1 truck camper, so be sure to SUBSCRIBE for our bi-monthly blog updates to stay in the loop!
And as always, thanks for reading!
Related Posts:
Save This Post to Pinterest!
We’d appreciate a share!


