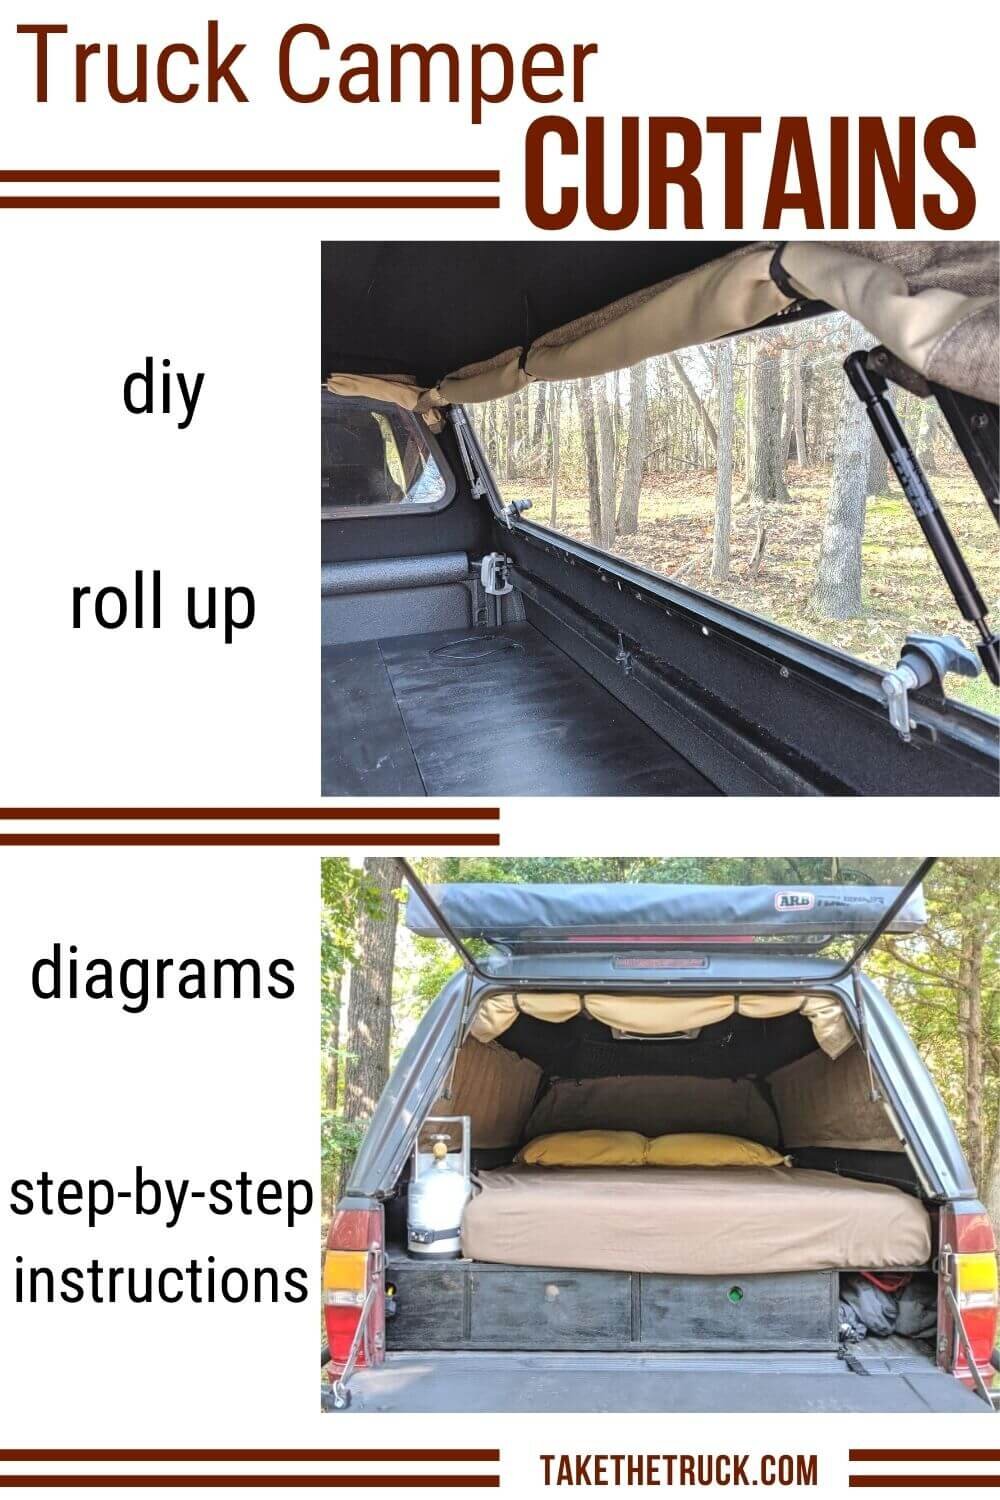
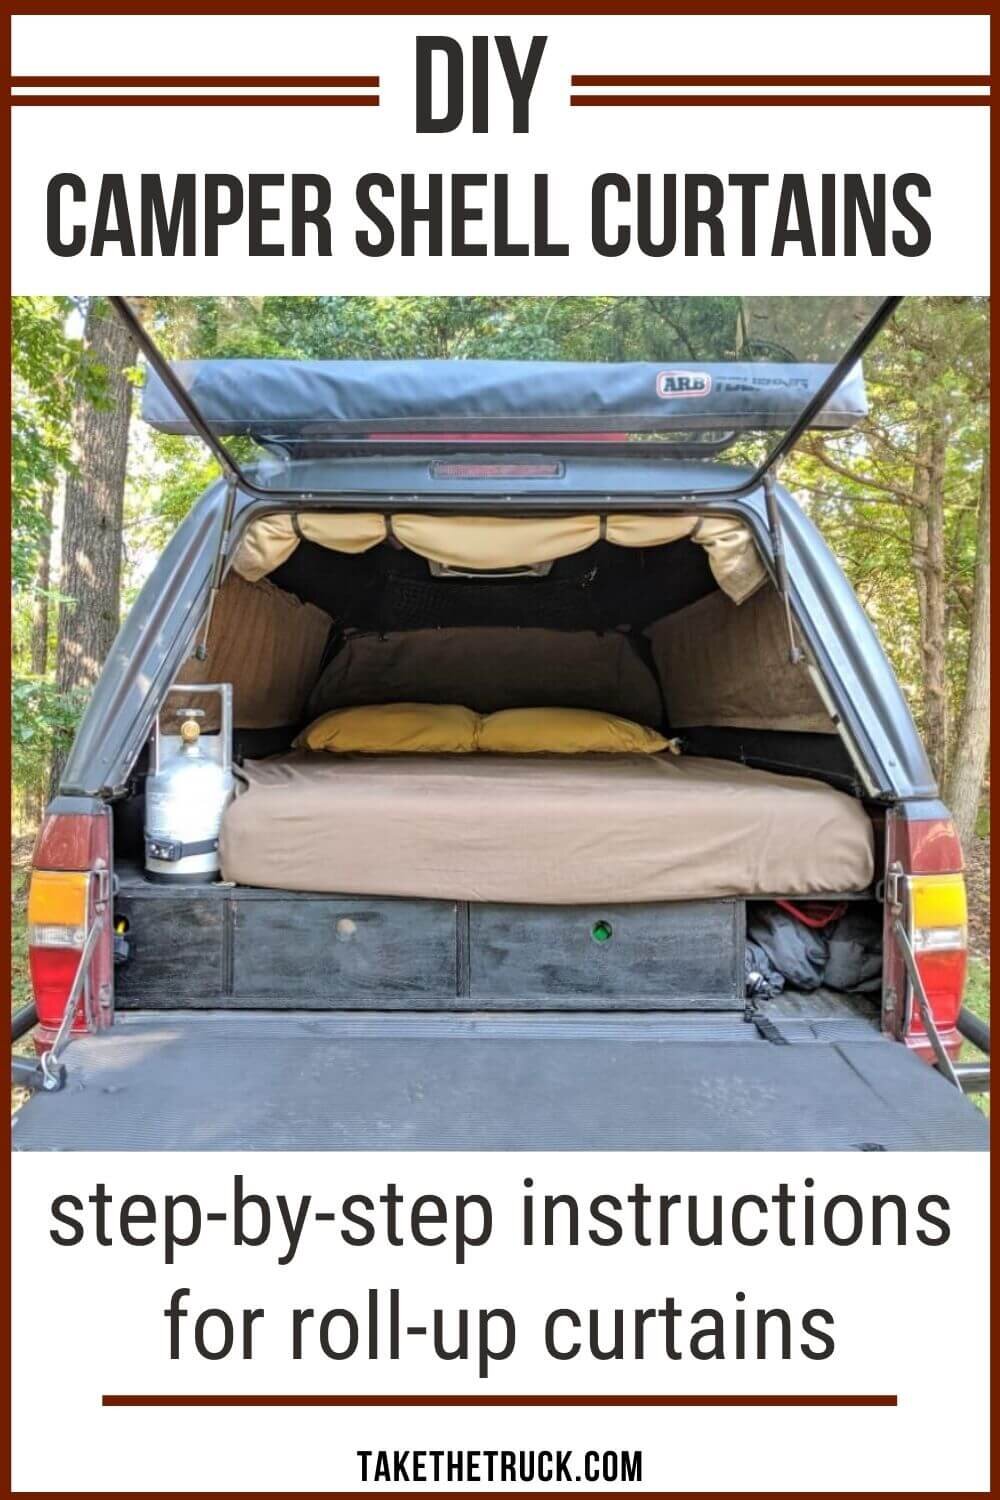
How To Make Roll-Up Camper Shell Curtains

(Psst! If you’re still debating what style of DIY camper curtains or window covers are for you, check out our mega post all about just that! If you’re here to learn more about exactly how to create these roll-up curtains, read on! More of a visual learner? Check out our video at the bottom of this post.)
Truck shell camping is a great way to get outside and explore - but once cozied back into your camper at the end of the night, you’re probably going to wish you had some camper shell curtains to keep the outside world...more outside.
Curtains can make your adventure mobile feel more like home, they can hide your valuables from prying eyes, provide privacy, and help insulate your truck bed from heat or cold.
Adding curtains to your camper shell doesn’t have to be a big or expensive project, but there are a few unique challenges related to creating DIY truck camper curtains. Here are three of the biggest we ran into:
Don’t worry, we give all the details on how to address these problems below!
Designing Our Camper Shell Curtains
We were pretty specific in what we wanted in these camper shell curtains after having different types of curtains or window covers in previous campers. Here’s what was at the top of our list:
when wanting daylight, we didn’t want to be completely removing and storing the curtains/window covers elsewhere
no drilling/mounting directly into shell because of the increased potential of it creating a leak
couldn’t attach much weight to the DIY headliner (like with velcro) because it may pull it away from the shell
wanted blackout fabric to help our little one easily sleep
wanted a nice overall look once done
So keeping all that in mind, we came up with these roll up camper shell curtains:
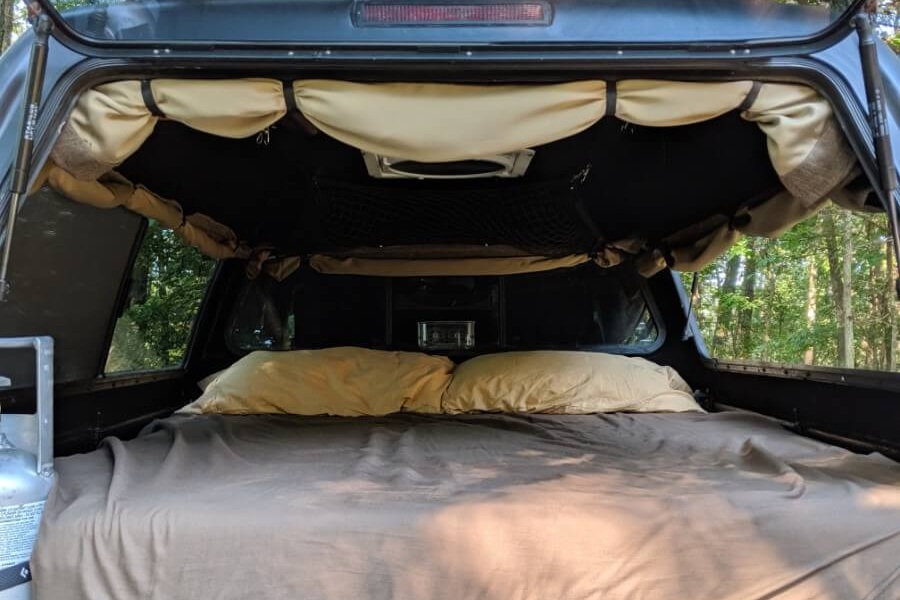
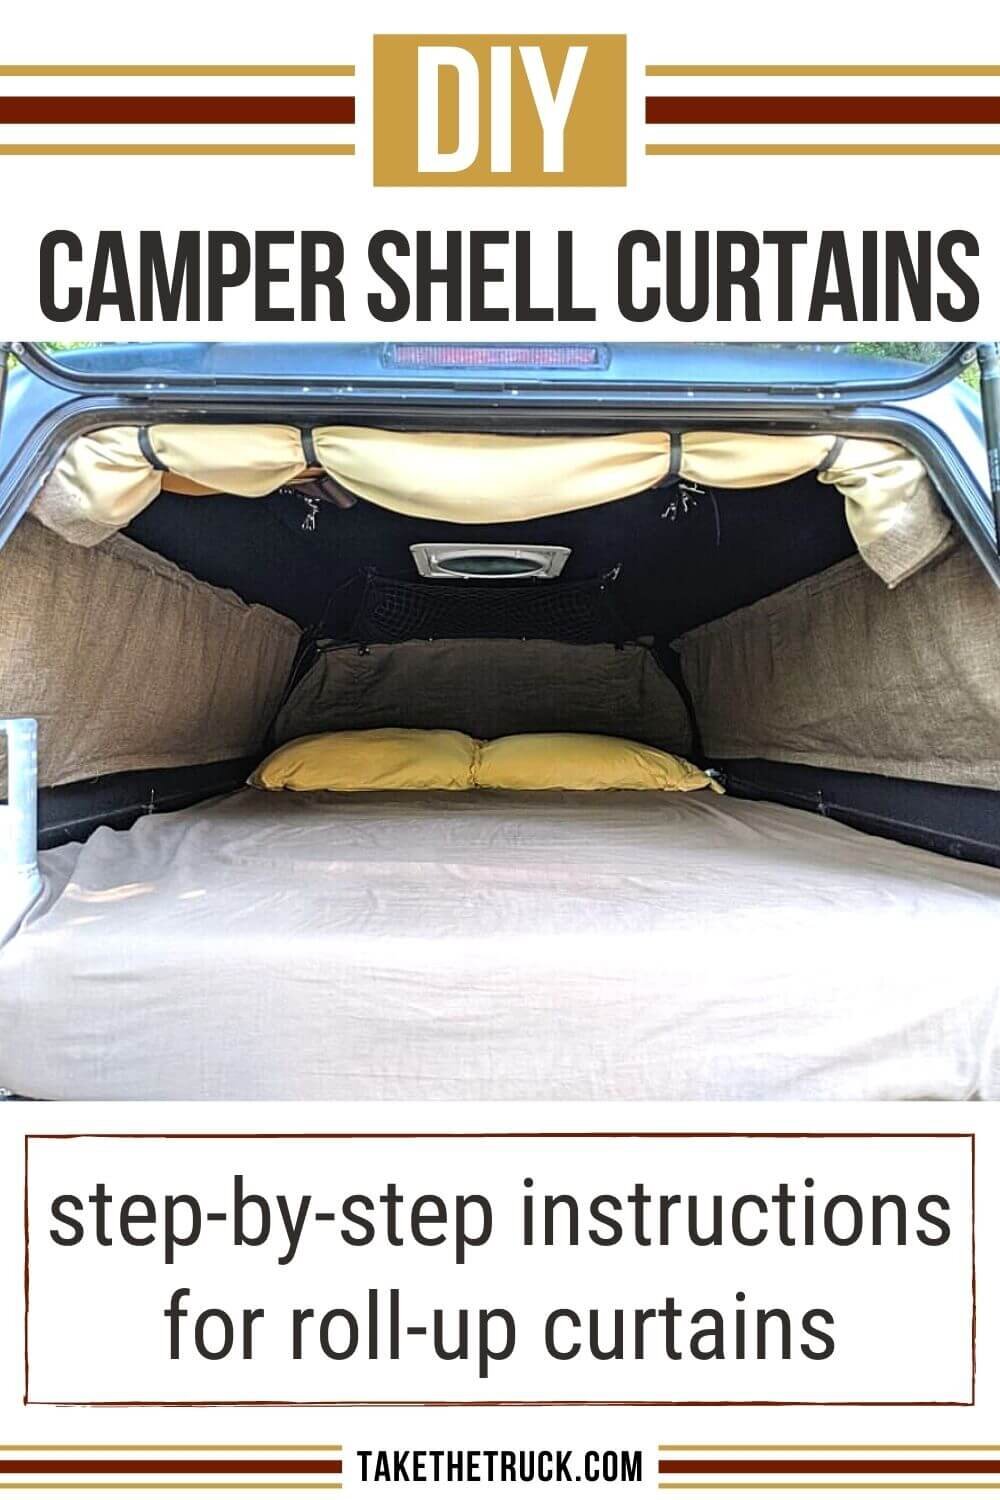
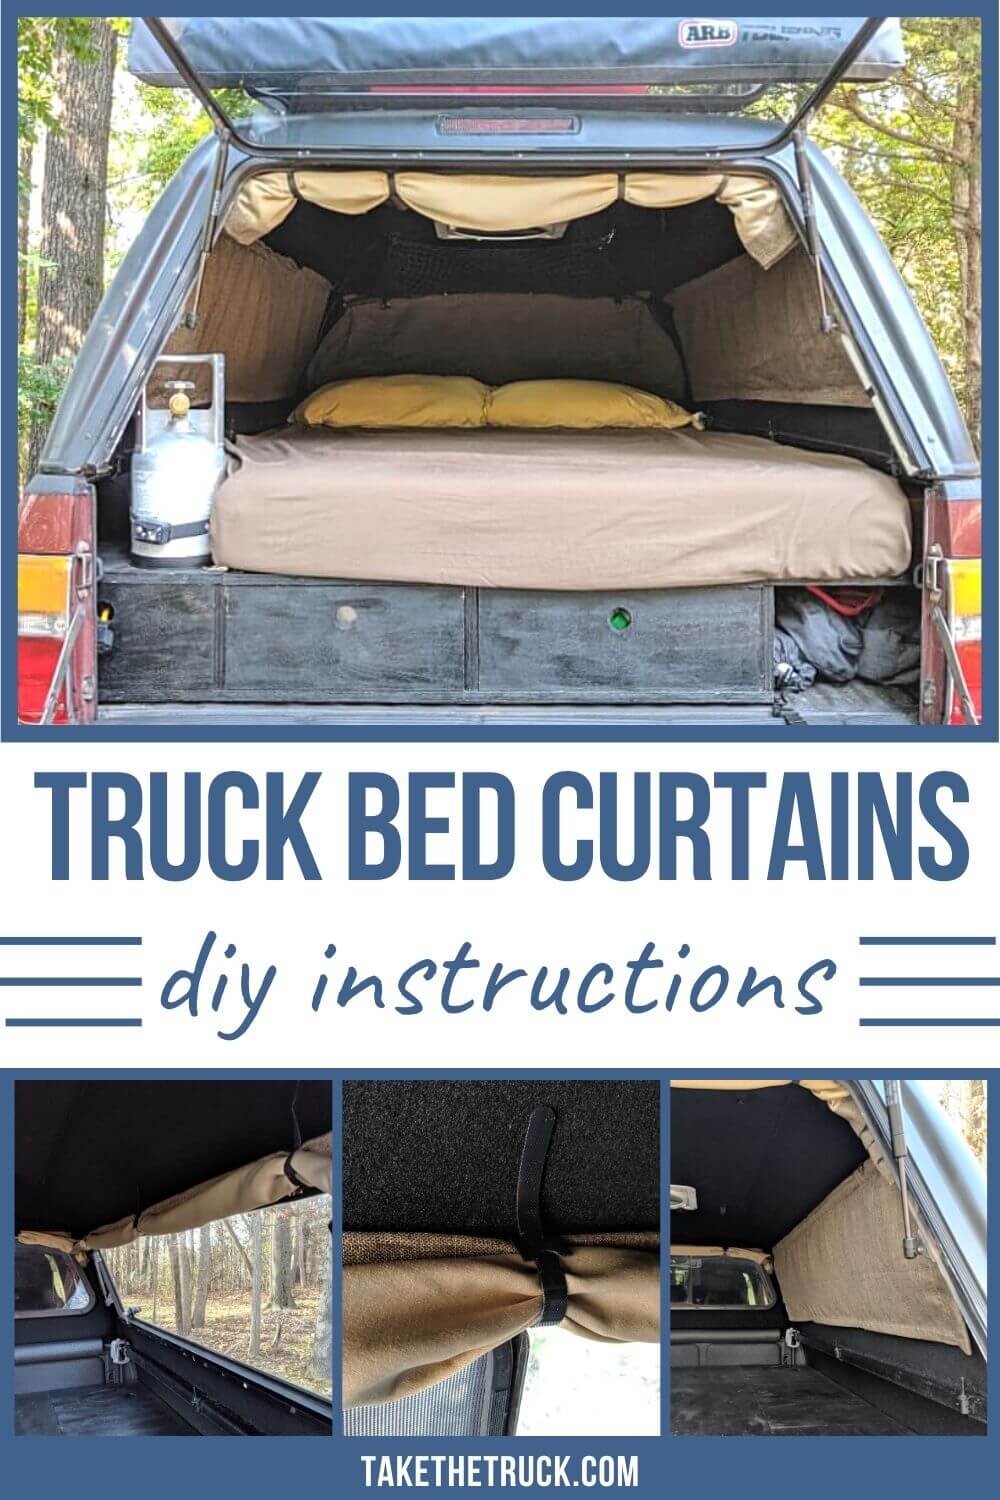
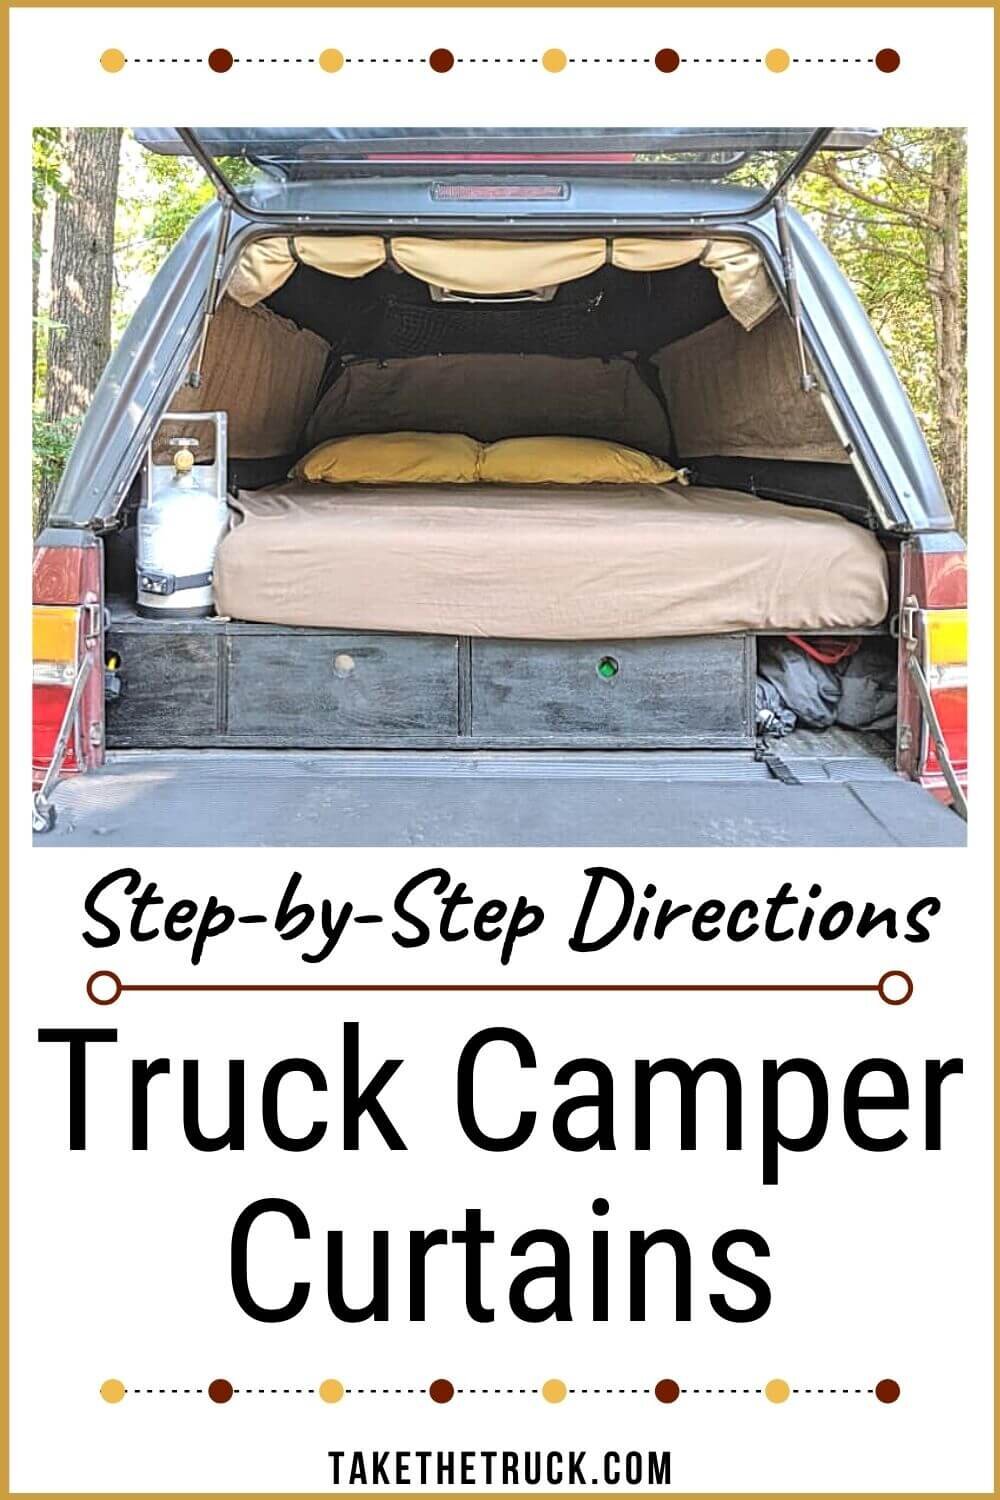
And although these aren’t the easiest DIY camper shell curtains, we’re happy with how they look and function. Here’s an overview of how they work:
Our truck camper curtains are mounted (primarily) across the top of the window frame using velcro.
Bundling straps are behind the velcro, held in place against the window frame.
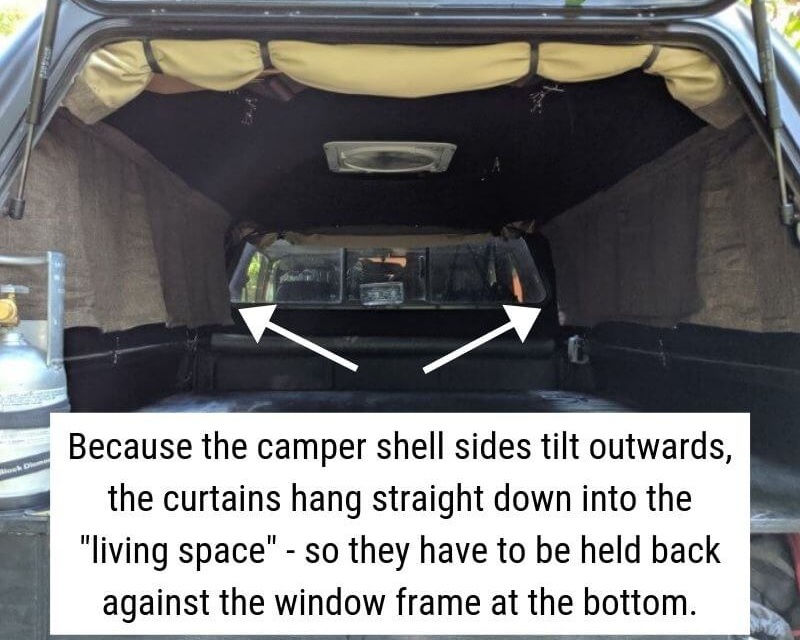
Magnets are sewn into the bottom hem of the fabric, and those attract to the screw heads in the bottom window frame (keeping the curtains from hanging straight down into our “living” space).
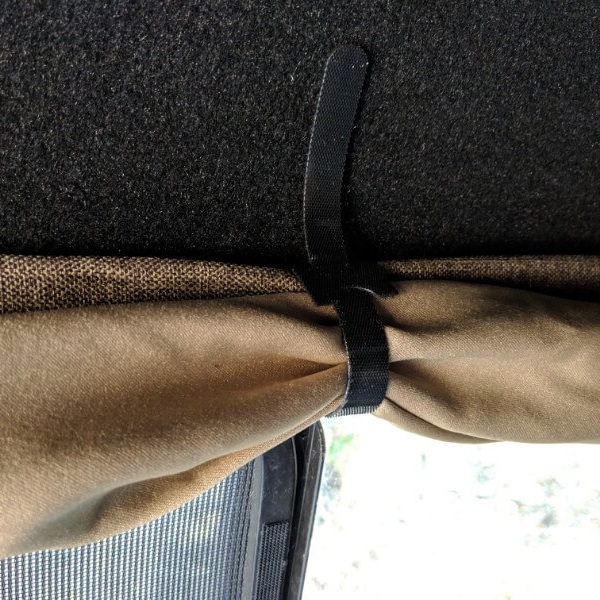
When not in use, the curtains roll up out of the way and are secured in a bundle across the top of the frame using the bundling straps.
So if roll-up curtains sound like a good fit for you and your setup, check out the step-by-step instructions below!
Step-by-Step Camper Shell Curtain Instructions
Needed Materials:
Quantity of each is dependent on the shape and size of your camper windows.
*(This post contains affiliate links. This means we may receive a small commission, at no additional cost to you, if you make a purchase through a link. See our full disclosure.)
Basic Measuring Tools
Sewing Machine and Basic Sewing Kit
Fabric- If you want tips on choosing fabric, go here.
If you’re looking for the exact curtains we used, they’re the ‘Eclipse Kenley Blackout Window Curtain Panels’ from Walmart
Velcro- we used a combination of sew on velcro where possible, and industrial strength adhesive velcro when necessary
If you do not have a headliner, a couple of these* should work perfectly (sew on loop/fuzzy side & adhesive hook/scratchy side)
If you do have a headliner, you’ll need industrial strength adhesive loop/fuzzy side velcro for your window frame (and I cannot find anywhere that sells this separately)
A good sew on velcro for your fabric* (we do not recommend going with adhesive velcro on your fabric unless it is very lightweight fabric)
Optional Fabric Fuse Tape*- if you’d rather not sew your hems
Bundling Straps (or string)- these 3M Scotch Bundling Straps* work great for us (you’ll probably need 2-3 packs)
Magnets- be sure whatever you get is strong enough to hold through a couple layers of your chosen fabric (rare earth magnets will be!)
If you do have magnetic surfaces on your window frame, this pack* should be enough
If you do not have magnetic surfaces on your window frame, go for these* (adhesive strip and double the number of magnets)
the long rectangular shape is nice because that leaves a little wiggle room when lining up your two magnetic surfaces
Paperclips or Clothespins
UV Sunblock Fabric Protector Spray* (optional)
Step 1: Make a plan for each camper shell window
First, go take a look at your camper shell windows and frames to make a plan for
1) how you will cut the fabric,
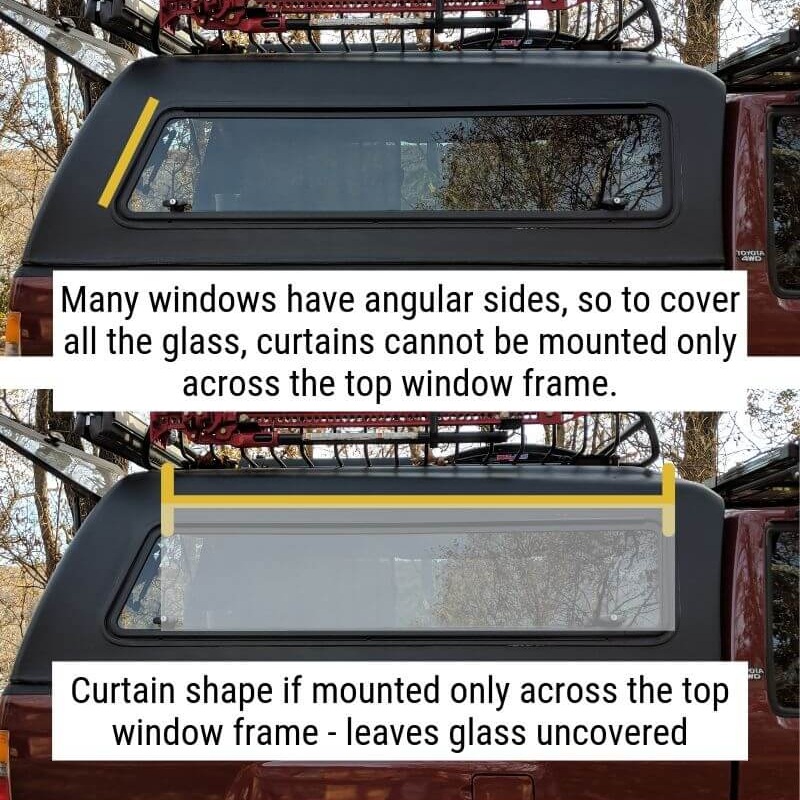
2) how you will mount the curtain to cover all the glass, and
3) how you will hold the bottom of the curtain against the side of the camper shell where needed.
You might find it helpful to scan through this entire post before heading out to your truck shell because tons of tips, recommendations, and things to think about are given throughout!
For the longer camper shell side windows:
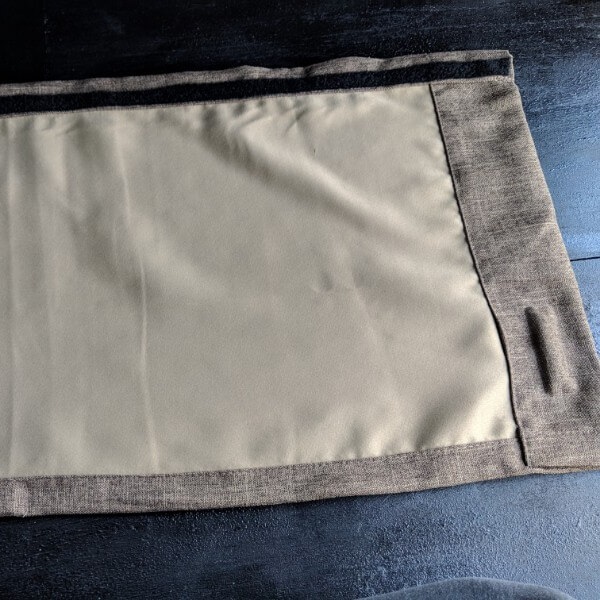
1. Curtain Fabric Plan:
Check out the image below to see why we landed on making long rectangular curtains.

2. Curtain Mounting Plan:
Determine whether or not you can mount your curtains across the top of the window frames using velcro. If you do have to mount the last few inches of your curtain onto the shell, decide how you’ll do that.
If you have a fiberglass (bare/no headliner) shell, just extend the velcro strip from the window frame out onto your shell and you’ll be good to go.
If you have a headliner in your shell, your velcro won’t need to extend beyond the window frame. But you will need to be more specific with which side of the velcro you place on the fabric (scratchy side on fabric - details below).

3. Curtain Hold Back Plan:
First, determine if you already have any magnetic surfaces on your window frames. We were able to use the existing screw heads that secure the window to the shell - check out the diagram below for details.

If you find some magnetic surfaces, check that the magnetic strength is strong enough for it to work through the hem of your curtain fabric.
*How To Add Magnetic Surfaces to Your Window Frame:
If you don’t have any magnetic surfaces, you can either add some, or check out the curtain hold down section in this post for other ideas.
If you do land on adding magnetic surfaces to your frame, we recommend trying the bar shaped rare earth magnets* that come with adhesive strips.
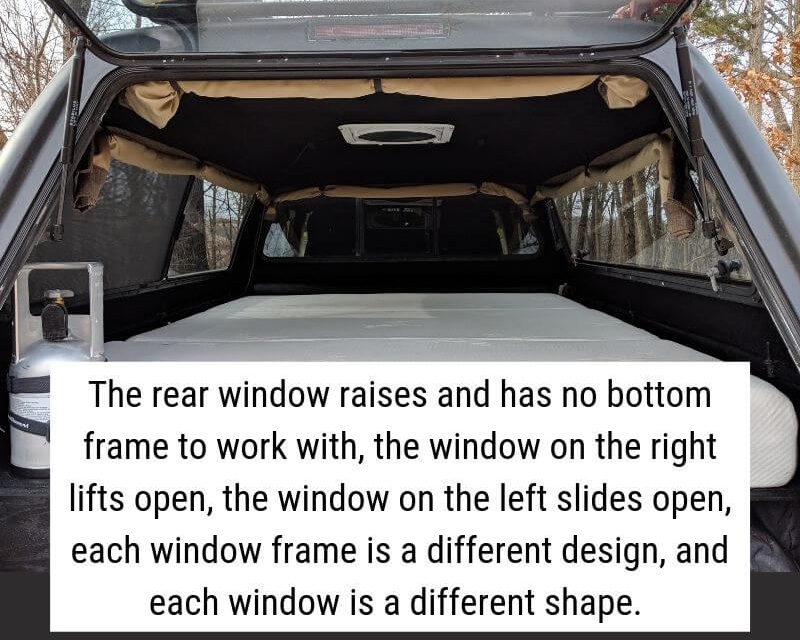
For the camper shell front and back hatch windows:
1. Curtain Fabric Plan:
The front and back windows are trapezoid shapes. Because of the shape of our camper shell (also a sort-of trapezoid), we decided to measure, cut, and sew these two curtains to be the same shape as the window, only larger in order to cover the ugly window frames

2. Curtain Mounting Plan:
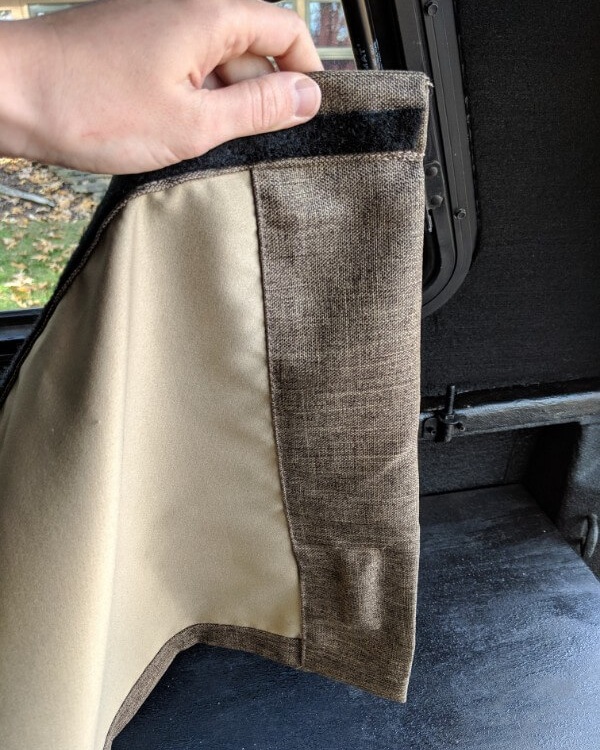
They mount across the top of the window frame with velcro just as the other windows. The scratchy side velcro across the entire top of the curtain does extend beyond the frame slightly and onto our shell’s headliner.
3. Curtain Hold Back Plan:
The front window against the cab didn’t need a magnet to hold it against the shell. We did add velcro tabs onto the two bottom curtain corners just to keep the curtain from curling in.
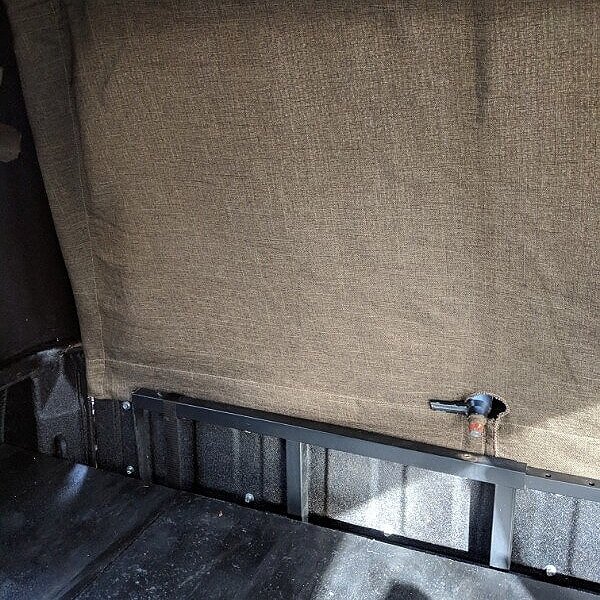
For the back hatch window, first determine if your bed liner is magnetic. If it is, we recommend using this as your magnetic surface to hold back the hatch window curtain.

Step 2: Measure, cut and sew the camper shell curtain tops and sides
Now that you’ve got a plan for each window, get the exact measurement that each curtain needs to be width-wise so that all of the glass and frame will be covered.
For those trapezoid shaped curtains, get the width measurement for across the top, about half way down, and across the bottom.
If you won’t be adding magnetic hold backs to the front window (the one against the cab that likely doesn’t tilt out at the bottom), you can go ahead and measure the exact length to finalize the bottom hem on that one right now.
For the other curtains, get rough but generous length measurements for each curtain so that you can cut off all the excess fabric and make each curtain easier to work with.
Don’t forget to add about ½ inch all the way around for the hems.
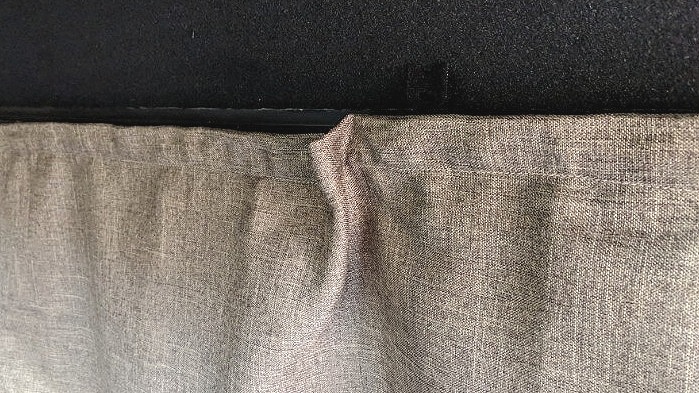
Back inside, finalize that top hem and both side hems with the sewing machine. Or use fabric tape to fold your cut sides under, creating a hem (I don’t have personal experience with this product but have seen it recommended when looking for a no-sew option).
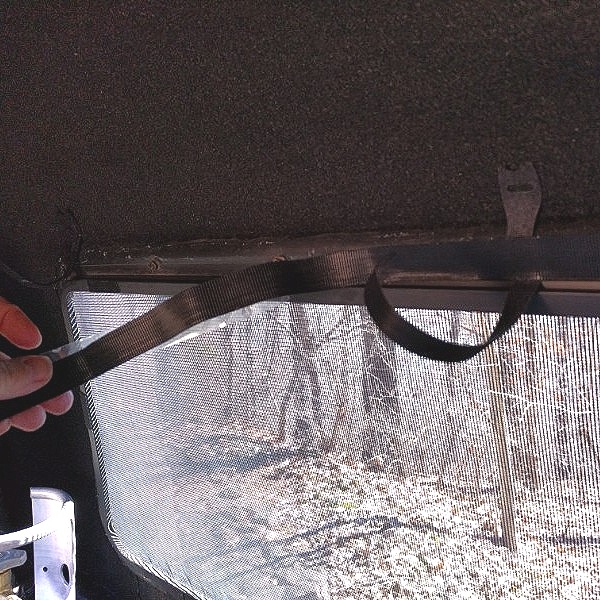
Step 3: Attach bundling straps and Velcro to your camper shell and curtain
Once you’ve got your top and side hems done, move on to attaching bundling straps and velcro to your camper shell window frames. Check out the images below for tips and recommendations.

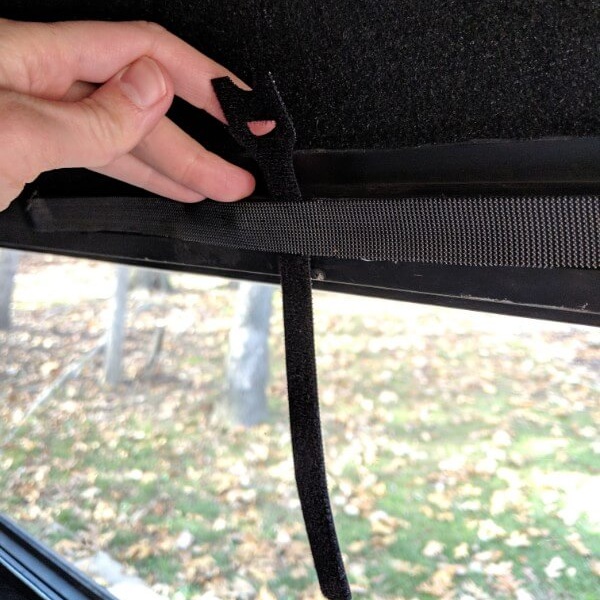

Then add velcro across the top of each curtain. Check out the images for tips!
Now that you’ve got velcro on both your curtain and your frame, you can temporarily hang the curtains in your camper shell.
Step 4: Measure the bottom hem and plan magnetic curtain hold-backs
Once your curtains are temporarily up, it’s time to measure the exact curtain length.
Pin up the bottom hem so that the length lines up just right with the bottom window frame. It needs to be pretty exact if you plan to use magnets in the hem to hold the curtain against the bottom window frame.
*Tip - Be sure your hem is wide/big enough to fit the magnets inside!
Once the hem is pinned up for all windows, use paperclips or clothespins to mark exactly where the magnets need to be sewn into the hem in order to line up with the magnetic surfaces on the window frame or truck bed/tailgate. Check out how we did ours below:

Back inside, get the magnets in place and sew around all sides of them so they can’t slide around. Don’t worry about the one in the center of the back hatch curtain yet!
Then sew up that bottom hem all the way across!
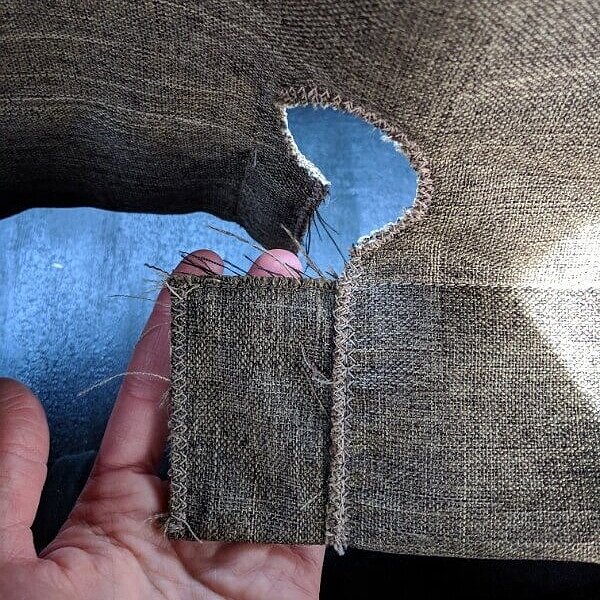
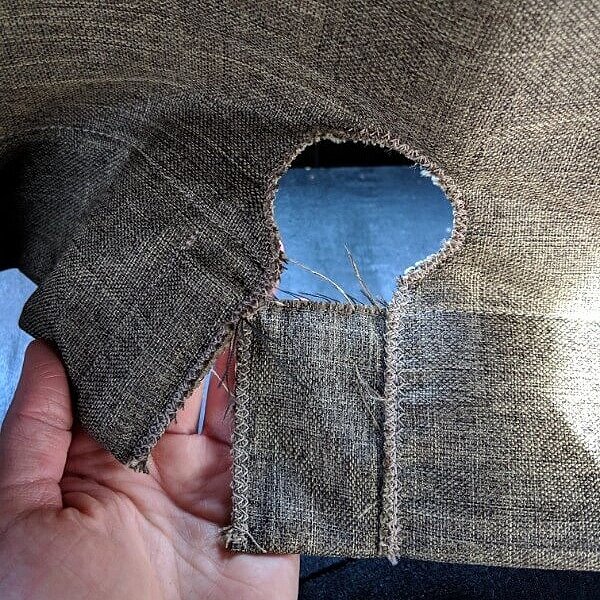
Step 5: Altering the back hatch curtain to go around the handle
Once to this point, three curtains should be all the way complete!
But the back hatch curtain will be drooping away from the tailgate in the middle, and that handle inside will be covered by the curtain.
You could just leave it like this and be all done, but because we had the time (and my mom’s help!), we stepped it up a notch.
Here’s what we did:
*Note - Don’t go through all these steps without FIRST ensuring your magnet will work through multiple layers of your curtain fabric.


Step 6: Hang and Celebrate
Optional: We’ve heard from some that they wish they’d have sprayed this UV sun fabric protector* on their curtains before hanging. We skipped this step, but it may be worth doing if you want your truck shell curtains to stay nicer even longer.
There you have it! That’s how we made our truck camper curtains!
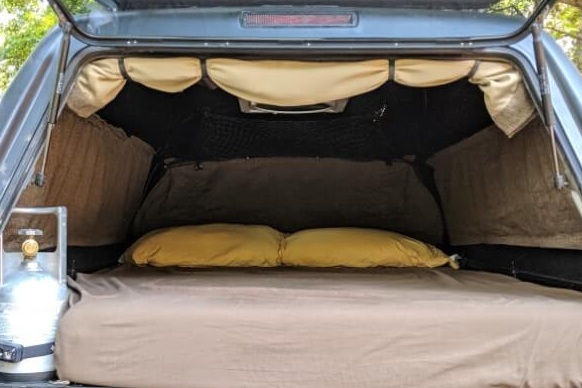
Once all camper shell curtains were successfully hung, we breathed a sigh of relief to finally be done with this project, and have it turn out well! We’re happy with how the curtains look and function when both up and down. They do work as blackout curtains, the magnets never come undone unless pulled on, they roll up fine, and stay securely in place once up.
All that said, we are super excited that our future Go Fast Camper will not need curtains and we won’t be having to do this again!
If you have any questions about our camper shell curtains, let us know in the comments section below! And we’d love for you to subscribe for more truck camping and travel related tips and updates.
As always, thanks for reading!
Related Posts:
Choosing the Best SUV or Truck Bed Mattress [Memory Foam vs Air Mattress vs Sleeping Pad]
Truck Bed Camper Interior: Organization and Space-Saving Storage Ideas
Pin these step-by-step instructions for later!
Sharing is caring!